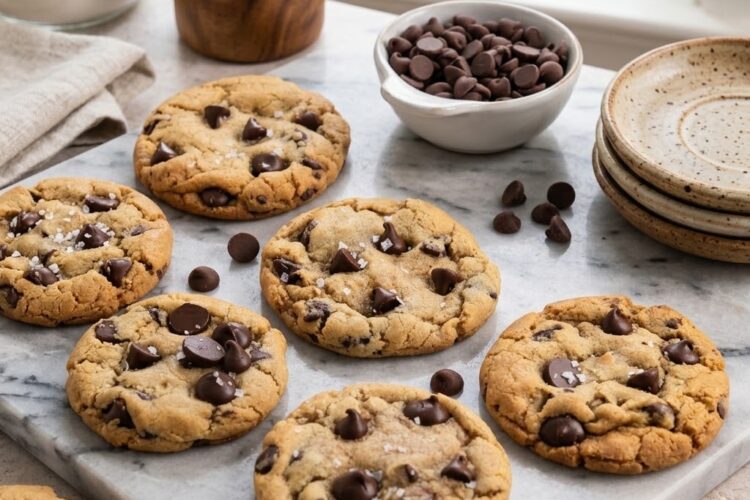
Finding a gluten-free chocolate chip cookie that has crisp golden edges, a soft center, and plenty of melted chocolate can be surprisingly difficult. Many gluten-free cookies turn out dry, crumbly, or overly firm, but this recipe takes a different approach.
These cookies are rich, chewy, buttery, and packed with chocolate chips, making them a satisfying homemade treat for anyone looking for an easy gluten-free dessert.
Why These Gluten-Free Cookies Work So Well
The texture is the biggest reason these gluten-free chocolate chip cookies stand out. The outside develops beautifully golden edges while the middle stays soft and gooey. A combination of gluten-free measure-for-measure flour and almond flour creates a tender cookie without making it fragile. Brown sugar contributes moisture and chewiness, while granulated sugar helps the edges become lightly crisp as the cookies bake.
Another important step is browning the butter before mixing the dough. Brown butter gives the cookies a deeper flavor with a warm, nutty quality that ordinary melted butter cannot provide. The process is simple, but it makes a noticeable difference in the finished cookies. Once the butter becomes golden and fragrant, it is removed from the heat and combined with the sugars, creating a rich base for the dough.
What Makes a Good Gluten-Free Chocolate Chip Cookie?
A successful gluten-free chocolate chip cookie needs the right balance of ingredients. Since traditional wheat flour contains gluten, which provides structure and elasticity, gluten-free baking requires a carefully selected flour blend. A measure-for-measure gluten-free flour is particularly useful because it is designed to replace conventional flour in many baking recipes.
For this recipe, the gluten-free flour is paired with almond flour. The almond flour adds tenderness and richness while helping prevent the cookies from becoming too dry. The baking soda provides the necessary lift and contributes to the attractive golden color around the edges. Kosher salt balances the sweetness and brings out the flavor of the chocolate and browned butter.
The Role of Brown Butter
Brown butter is one of the key flavor-building steps in this cookie recipe. When butter melts and continues cooking, the milk solids begin to brown. This creates a toasted, nutty aroma and a richer flavor. Because the butter can change from golden to browned quite quickly, it is important to watch it carefully and stir continuously once it begins to foam.
The butter should be removed from the heat as soon as it reaches a golden-brown color and develops a nutty smell. Pouring it into a bowl immediately stops the cooking process. This browned butter becomes the flavorful foundation of the cookie dough, giving each bite a more complex taste without requiring any complicated ingredients.
Choosing the Right Gluten-Free Flour
Not every gluten-free flour behaves the same way in cookies. For reliable results, use a gluten-free measure-for-measure flour blend that contains xanthan gum. Xanthan gum helps provide some of the structure that gluten would normally contribute to a traditional cookie dough. Without an appropriate binder, gluten-free cookies can sometimes spread too much or fall apart after baking.
A 1:1 or measure-for-measure blend is convenient because it is formulated for straightforward substitution. Check the flour package before beginning to make sure it contains xanthan gum. This small detail can have a significant effect on the texture and stability of the finished gluten-free chocolate chip cookies.
Preparing the Cookie Dough
Begin by combining the gluten-free flour, almond flour, baking soda, and kosher salt in a medium bowl. Whisking the dry ingredients together helps distribute the baking soda and salt evenly throughout the flour mixture. This means every cookie should have a consistent texture and flavor.
Next, prepare the brown butter. Melt the butter in a skillet over medium-low heat, stirring occasionally. Once it starts foaming, stir continuously so the milk solids do not stick to the bottom of the skillet. Watch the color closely because the butter can brown quickly. When it becomes golden and smells nutty, transfer it immediately to a bowl.
Add the milk, brown sugar, and granulated sugar to the warm brown butter. Whisk everything together until combined. The brown sugar provides moisture and a deeper caramel-like sweetness, while the granulated sugar contributes to the crispness that develops around the cookie edges during baking.
The egg and vanilla extract are added next. Whisk until the mixture looks smooth and creamy. Vanilla enhances the overall flavor of the cookies, while the egg helps bind the ingredients and contributes to the soft center. Avoid overmixing once the dry ingredients are introduced, because a gentle mixing process is enough to bring the dough together.
Adding the Chocolate Chips
Once the wet ingredients are ready, use a rubber spatula to mix in the dry ingredients. Stir until no obvious pockets of flour remain and the dough is well combined. Then fold in the chocolate chips, distributing them throughout the dough so that each scoop contains plenty of chocolate.
Chocolate chips provide the classic flavor that makes these cookies so popular. As the cookies bake, the chocolate becomes soft and rich, creating pockets of melted chocolate throughout the chewy dough. For the best appearance, a few extra chocolate chips can also be placed on top of the dough balls before baking, although this is not required by the recipe.
Why Resting the Dough Matters
Allowing the dough to rest for 30 minutes is an important part of this recipe. Gluten-free flour benefits from additional time to absorb moisture from the wet ingredients. This helps improve the texture and allows the dough to become more cohesive before it goes into the oven.
The resting period also gives the flavors time to develop. If you have more time, the dough can be refrigerated for up to five days according to the recipe notes. A longer chilling period can produce even more developed flavor while making the dough convenient to prepare ahead of time.
How to Bake Gluten-Free Chocolate Chip Cookies
Before baking, preheat the oven to 350°F and prepare large baking sheets with parchment paper or silicone baking mats. Using a lined baking sheet helps prevent sticking and makes cleanup easier. It also creates a consistent surface for the cookies to spread and bake.
Scoop the rested dough into round portions of approximately two tablespoons each. Place the dough balls about two inches apart on the prepared baking sheet. Giving the cookies enough space is important because they spread as they bake. Crowding the pan can cause individual cookies to run together.
Bake the cookies for approximately 10 to 12 minutes, watching the edges carefully. The edges should become golden brown while the centers remain softer. Avoid waiting until the entire cookie looks completely firm in the oven. Cookies continue cooking from residual heat after they are removed, so taking them out at the right moment helps preserve their chewy centers.
Getting Crisp Edges and Gooey Centers
The contrast between crisp edges and soft centers is one of the most appealing characteristics of these gluten-free chocolate chip cookies. The sugars contribute to browning and crispness around the outside, while the brown sugar and egg help retain moisture toward the center.
Baking time can vary slightly depending on the oven, the size of the cookie dough portions, and the baking sheet being used. Start checking around the 10-minute mark. When the edges are golden and the center has set but still appears softer, remove the cookies from the oven.
Cooling the Cookies Properly
After baking, allow the cookies to remain on the baking sheet for about five minutes. This short cooling period gives the cookies time to firm up enough to handle without losing their tender texture. If you move them immediately, the warm centers may cause the cookies to bend or break.
After five minutes, transfer the cookies to a wire rack to finish cooling. If you enjoy the combination of sweet and salty flavors, sprinkle the cookies with flaky sea salt while they are still warm. The salt adds a subtle contrast to the brown sugar and chocolate.
Dairy-Free Gluten-Free Cookies
This recipe can also be adapted for a dairy-free diet. According to the provided recipe, skip the butter-browning steps and use melted dairy-free butter instead. Because dairy-free butter does not brown in the same way as traditional butter, the distinctive brown-butter flavor will not be present.
The milk should also be omitted, and dairy-free chocolate chips should be used. When choosing packaged ingredients for a dairy-free version, check the labels carefully because chocolate chips and butter alternatives can vary in their ingredients and allergen information.
Nut-Free Gluten-Free Cookies
The almond flour can be replaced if you need a nut-free version. The specified adjustment is to use an additional ¼ cup of gluten-free measure-for-measure flour in place of the almond flour.
This substitution changes the flour balance slightly while keeping the recipe accessible for people avoiding nuts. As with any allergy-friendly preparation, make sure all packaged ingredients and kitchen equipment are suitable for the dietary requirement and have not been exposed to the relevant allergen.
Freezing Gluten-Free Cookie Dough
Freezing the cookie dough is a practical way to keep homemade cookies ready for later. The dough can be shaped into individual balls and stored in a resealable bag. This makes it possible to bake only the amount you need instead of preparing an entire batch at once.
When baking frozen dough balls, the recipe notes recommend adding approximately one to two minutes to the baking time. Keep an eye on the edges and center rather than relying only on the clock. The cookies should still develop golden edges while maintaining their soft centers.
How to Store Homemade Gluten-Free Cookies
Once completely cooled, store the cookies in an airtight container at room temperature. Keeping the container sealed helps reduce moisture loss and preserves the chewy texture. If the cookies are left uncovered for too long, they can gradually become firmer and less tender.
For the best texture, allow the cookies to cool completely before sealing them in a container. Packing them while they are still very warm can trap excess moisture inside the container, which may affect their texture.
Common Baking Mistakes to Avoid
One common mistake is using a gluten-free flour that does not contain an appropriate binder. Since the recipe specifically relies on a measure-for-measure blend containing xanthan gum, changing the flour type without considering its formulation can affect the final cookies.
Another mistake is over-browning the butter. Brown butter develops quickly, so leaving it unattended can result in burnt milk solids and a bitter taste. Stirring continuously once the butter begins to foam makes it easier to control the process.
Overbaking is another issue to watch for. Gluten-free cookies can become dry if they remain in the oven too long. Look for golden edges and a set center rather than waiting for the entire surface to become dark and firm.
Frequently Asked Questions
Are these cookies completely gluten-free?
The recipe is designed as a gluten-free chocolate chip cookie recipe and uses gluten-free measure-for-measure flour. For people with celiac disease or a medically required gluten-free diet, it is important to verify that every packaged ingredient is certified or labeled appropriately and that preparation surfaces and utensils are not contaminated with gluten.
Can I make the dough ahead of time?
Yes. The dough can rest at room temperature for 30 minutes or be refrigerated for up to five days, according to the recipe notes. Refrigerating the dough can also allow the flavors to develop further before baking.
Why are my gluten-free cookies crumbly?
The type of gluten-free flour can make a major difference. A measure-for-measure blend containing xanthan gum is recommended for this recipe because it provides structure. Incorrect flour substitutions, insufficient moisture, or overbaking can also contribute to a crumbly texture.
Can I freeze the cookie dough?
Yes. Shape the dough into individual balls and store them in a resealable bag. When baking from frozen, add approximately one to two minutes to the baking time and monitor the cookies for golden edges and properly set centers.
What gives these cookies their chewy texture?
Brown sugar, butter, egg, and the correct gluten-free flour blend all contribute to the texture. The 30-minute resting period also allows the gluten-free flour to absorb moisture, helping create a more cohesive and tender cookie.
Notes
Gluten-Free Flour
Use a gluten-free measure-for-measure flour blend containing xanthan gum. This ingredient helps provide structure in the absence of wheat gluten. The recipe notes specifically identify King Arthur Flour Measure-for-Measure Flour and mention Bob’s Red Mill 1:1 Baking Flour as another option.
Dairy-Free Option
For dairy-free cookies, use melted dairy-free butter instead of regular butter, omit the milk, and choose dairy-free chocolate chips. Because dairy-free butter does not brown like conventional butter, this version will not have the same browned-butter flavor.
Nut-Free Option
Replace the almond flour with an additional ¼ cup of gluten-free measure-for-measure flour. This keeps the recipe free from almond flour while maintaining the intended flour-based structure.
Resting the Dough
A 30-minute rest gives the gluten-free flour time to hydrate and allows the flavors to develop. Refrigerating the dough for longer can provide an even deeper flavor and also makes it convenient to prepare the dough ahead of baking.
Freezing
Cookie dough balls can be frozen in a resealable bag. Bake them directly according to the recipe and allow an additional one to two minutes of baking time as needed.
Why You’ll Want to Make These Cookies
These gluten-free chocolate chip cookies combine several qualities that are difficult to resist: crisp golden edges, soft chewy centers, rich chocolate chips, and the deep flavor of browned butter. The method is straightforward enough for everyday baking, while the finished texture feels special enough for holidays, parties, bake sales, or casual desserts.
The recipe also offers useful flexibility for different dietary needs. With the specified adjustments, it can be made dairy-free or nut-free while retaining the basic character of the cookies. Whether you are completely gluten-free or simply looking for a delicious alternative to traditional chocolate chip cookies, this recipe provides a practical way to enjoy a classic homemade dessert.
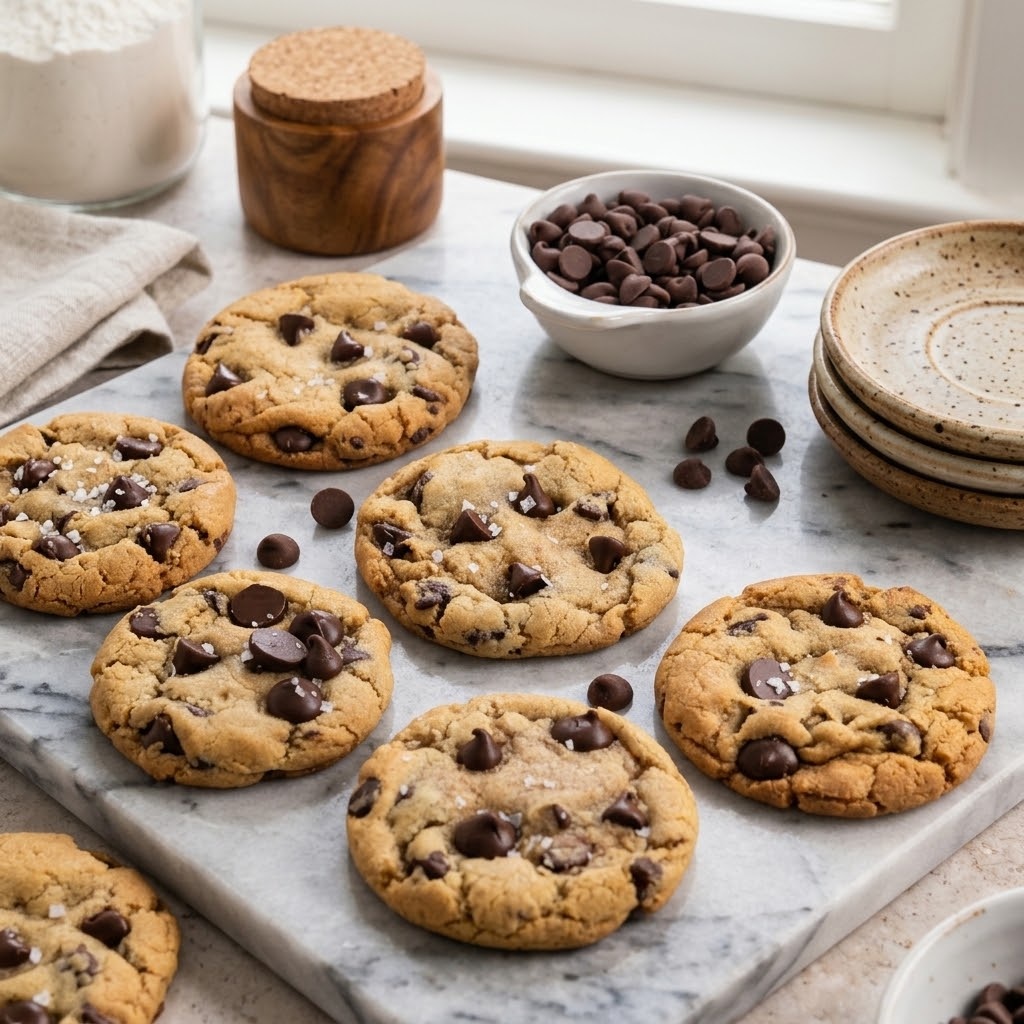
Gluten Free Chocolate Chip Cookies
 Recipe by admin1
Chewy gluten-free chocolate chip cookies with crisp golden edges, soft centers, melted chocolate chips, and a rich browned-butter flavor.
4
servings15
minutes10
minutes184
kcal30
minutes55
minutesIngredients
- Dry Ingredients
1 1/3 cups (200g) gluten-free measure-for-measure flour
1/4 cup (25g) almond flour
1 teaspoon baking soda
1/2 teaspoon kosher salt
- Other Ingredients
1/2 cup (113g) butter
1 tablespoon milk of choice
3/4 cup (160g) brown sugar
1/4 cup (50g) granulated sugar
1 large egg
2 teaspoons vanilla extract
1 cup (170g) chocolate chips
Sea salt for sprinkling, optional
Directions
- In a medium bowl, whisk together the gluten-free measure-for-measure flour, almond flour, baking soda, and kosher salt. Mix thoroughly so the baking soda and salt are evenly distributed. Set the dry mixture aside while you prepare the browned butter.
- Place the butter in a medium skillet over medium-low heat. Stir occasionally as it melts. When the butter begins to foam, stir continuously to keep the milk solids from sticking to the skillet. Continue until the butter turns golden brown and develops a nutty aroma.
- Immediately remove the browned butter from the heat and pour it into a medium bowl. Add the milk, brown sugar, and granulated sugar. Whisk until the ingredients are thoroughly combined.
- Whisk the egg and vanilla extract into the butter and sugar mixture. Continue mixing until the mixture becomes smooth and creamy.
- Using a rubber spatula, gradually mix the dry ingredients into the wet mixture. Stir until the dough is well combined. Fold in the chocolate chips, distributing them evenly throughout the dough.
- Cover the bowl and let the cookie dough sit at room temperature for 30 minutes. Alternatively, refrigerate the dough for up to five days if preparing it ahead of time.
- Preheat the oven to 350°F. Line large baking sheets with parchment paper or silicone baking mats.
- Scoop approximately two tablespoons of dough for each cookie and roll into round balls. Arrange the dough balls on the prepared baking sheet, leaving about two inches between each one.
- Bake for 10–12 minutes, or until the edges are golden brown and the centers are set. Avoid overbaking if you want the cookies to remain soft and chewy in the middle.
- Remove the baking sheet from the oven and let the cookies cool for five minutes. Sprinkle with flaky sea salt if desired, then transfer the cookies to a wire rack to cool completely.
Nutrition Facts
- Total number of serves: 1
- Calories: 184kcal
- Fat: 8g
- Carbohydrates: 25g
- Fiber: 1g
- Sugar: 18g
- Protein: 2g


