
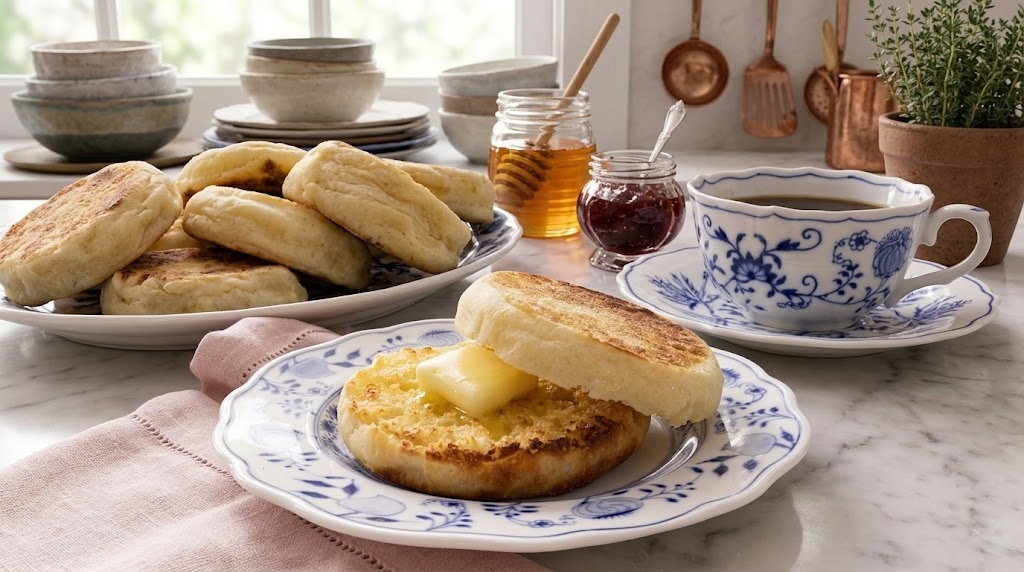
These homemade English muffins are soft, chewy, lightly crisp on the outside, and full of the classic little nooks and crannies that make them so good with butter, jam, or a favorite breakfast filling. Unlike many homemade bread recipes, these English muffins are cooked on a skillet rather than baked in the oven. The result is a beautifully golden surface with a tender interior that is perfect for splitting open and toasting.
Making English muffins from scratch is much easier than it may seem. The dough comes together with simple pantry ingredients, and there is no complicated shaping technique required. Once the dough has risen, it is rolled or gently patted out, cut into rounds, allowed to puff again, and cooked slowly in a skillet. The process is straightforward enough for beginners while still producing muffins with the texture and flavor of a bakery-style breakfast bread.
Why Make English Muffins at Home?
Store-bought English muffins are convenient, but homemade English muffins offer a freshness and texture that is difficult to match. The muffins can be served warm soon after cooking, when the crust is still slightly crisp and the inside is tender. Freshly cooked muffins also give you control over how deeply they are browned and how soft or crisp you want the finished surface to be.
This recipe is especially useful if you enjoy making homemade breakfast recipes but do not want a complicated baking project. The ingredient list is short, and most of the preparation involves allowing the yeast dough enough time to develop. A stand mixer makes the dough particularly easy to prepare, although the key is simply mixing until the dough becomes smooth, elastic, and pulls away from the sides of the bowl.
English muffins are also wonderfully versatile. They can become a quick weekday breakfast when toasted and topped with butter and jam, or they can form the base of a more substantial breakfast sandwich. Use them for eggs, bacon, sausage, or cheese, or serve them alongside scrambled eggs and fresh fruit. Their slightly chewy texture makes them suitable for both sweet and savory combinations.
Understanding the Dough
The foundation of these homemade English muffins is a yeast dough made with milk, water, sugar, flour, salt, butter, and egg. The milk and water provide moisture, while the sugar gives the yeast a little food and adds a subtle sweetness. Active dry yeast is responsible for creating the rise that gives the muffins their airy interior.
The flour provides the structure needed to hold the dough together, while salt balances the flavor. Melted butter contributes richness, and the egg helps create a tender texture. These ingredients work together to produce dough that is soft and elastic rather than dense or dry. Keeping the proportions unchanged is important because each ingredient contributes to the final consistency.
The yeast mixture should become foamy before it is added to the flour. This short waiting period is useful because it gives you an early indication that the yeast is active. The liquid should be warmed to approximately 110°F rather than made extremely hot. Excessively hot liquid can interfere with yeast activity, while properly warmed liquid helps encourage fermentation.
How to Activate the Yeast
Begin by combining the milk, water, and granulated sugar. Warm the mixture to 110°F, then add the active dry yeast and stir gently. Let it stand for approximately five to seven minutes. During this time, the surface should develop a foamy head. This is the visual sign that the yeast has activated and is ready to help the dough rise.
While the yeast mixture rests, combine the all-purpose flour and salt in the bowl of a stand mixer. Whisking these dry ingredients together helps distribute the salt throughout the flour. Fit the mixer with a paddle attachment so the liquid ingredients can be incorporated gradually and evenly.
The egg and melted, slightly cooled butter are mixed into the milk and yeast mixture before the liquid is added to the flour. Pouring it in slowly while the mixer runs on low helps prevent dry flour pockets and allows the ingredients to come together smoothly. Once incorporated, the mixer speed can be increased for several minutes.
Mixing the English Muffin Dough
The dough should be mixed for about seven minutes on medium-high speed. Pay attention to its appearance rather than relying only on the timer. Properly mixed dough should become smooth and elastic and should pull away from the sides of the bowl. It may still feel soft, but it should have enough structure to hold together.
After mixing, transfer the dough to a large oiled bowl. Cover the bowl with plastic wrap and place it somewhere warm. Allow the dough to rise until it has approximately doubled in size, which usually takes around one hour. The exact rising time can vary depending on the temperature of your kitchen, so the volume of the dough is a more useful guide than the clock.
For convenient meal preparation, the dough can also be refrigerated overnight. This option allows you to prepare the dough in advance and finish the muffins the following day. If the dough has been chilled, allow it to warm for approximately one hour before continuing with the shaping and cooking process.
Shaping the Muffins
Once the dough has risen, transfer it to a lightly floured counter. Add a small amount of flour to the top and gently spread or pat the dough until it is just under one inch thick. Avoid pressing the dough excessively because you want to retain some of the air developed during fermentation.
Prepare two baking sheets by lining them with parchment paper and sprinkling the surfaces with cornmeal or semolina. The cornmeal or semolina helps prevent sticking and also contributes to the characteristic lightly textured exterior of homemade English muffins.
Use a 2½-inch round cutter to cut the dough into individual muffins. Transfer each round carefully to the prepared baking sheets. A spatula can be helpful if the dough is soft. Once the first rounds have been cut, gently bring the remaining scraps together, re-roll or pat the dough, and continue cutting until all the dough has been used.
Cover the trays loosely with plastic wrap and let the shaped muffins rise again for approximately 30 minutes. They should look visibly puffed when they are ready for the skillet. This second rise is important because it helps create a lighter interior rather than a heavy, compact muffin.
Cooking English Muffins in a Skillet
The cooking method is one of the defining features of this recipe. Place a large skillet over medium heat and allow it to warm thoroughly. You can check the temperature by holding your hand a few inches above the surface and feeling for the heat. Sprinkle some cornmeal or semolina over the skillet before carefully placing three or four muffins onto the surface.
Cover the skillet and reduce the heat to medium-low. Cook the muffins for approximately six to eight minutes. The bottoms should become browned while the tops should look dry rather than wet. If the bottoms are becoming dark too quickly while the tops remain undercooked, lower the heat further.
Carefully turn each muffin and continue cooking for another six to eight minutes. The second side should also develop an attractive golden-brown surface. Cooking slowly is important because English muffins need enough time for the centers to cook while the exterior develops color without burning.
If you are making these muffins for the first time, cooking one test muffin before preparing the entire batch can be extremely helpful. It gives you an opportunity to judge how quickly your skillet browns the dough and whether the heat needs adjustment. Once you know how your pan behaves, the remaining muffins should be much easier to cook consistently.
How to Get Plenty of Nooks and Crannies
The signature nooks and crannies are one of the main reasons people love English muffins. Several parts of the process contribute to this texture, including proper yeast activation, adequate rising time, gentle handling of the dough, and controlled skillet cooking. Avoid flattening the shaped rounds aggressively because excessive pressure can remove some of the air developed during rising.
Allowing the dough to become visibly puffy before cooking is another important step. Yeast needs sufficient time to create the internal structure that gives the muffins their characteristic open crumb. A warm environment encourages the dough to rise efficiently, but it should not be placed somewhere excessively hot.
The skillet temperature also matters. If the pan is too hot, the exterior may brown before the center has cooked. If it is too cool, the muffins may take too long to develop a proper crust and can lose some of their desirable texture. Medium heat followed by medium-low cooking provides a controlled environment for gradually cooking the muffins through.
Serving Suggestions
Freshly cooked English muffins can be enjoyed in many ways. For a simple breakfast, split one open and spread it generously with butter while it is still warm. Add your favorite jam for sweetness, or try honey for a simple alternative. Toasting the muffins after they have cooled slightly makes the edges crisp while keeping the interior pleasantly chewy.
For a savory breakfast, use these muffins as the base for breakfast sandwiches. Add cooked sausage, bacon, egg, or cheese for a filling meal. They are also an excellent choice for eggs Benedict because their sturdy structure can support poached eggs and sauce while their nooks and crannies help hold flavorful toppings.
These muffins can also be served as part of a larger breakfast spread. Pair them with eggs, fresh fruit, yogurt, or other breakfast favorites. Because their flavor is mild and slightly buttery, they work equally well with sweet and savory toppings.
Storage and Reheating
Allow freshly cooked English muffins to cool before storing them. Keeping them properly covered helps prevent unnecessary moisture loss. For the best texture, split the muffins before toasting rather than cutting them with a knife if you want to encourage the classic uneven interior.
When reheating, a toaster is an excellent option because it crisps the edges while warming the inside. A skillet can also be used when you want a slightly more toasted surface. If the muffins have been stored for several days, toasting them helps restore some of the crisp texture they had when freshly prepared.
Notes for Successful Homemade English Muffins
The most important part of this recipe is temperature control. Make sure the milk and water mixture reaches approximately 110°F before adding the yeast. Give the yeast enough time to become foamy, and allow the dough to rise until it has doubled rather than relying strictly on a fixed time.
Handle the dough gently during shaping and avoid adding excessive flour. Too much flour can make the muffins heavier and less tender. When cooking, keep a close eye on the first muffin or two and adjust the skillet temperature if necessary. Different pans and stovetops can brown the dough at different rates.
It is also important to clear away old cornmeal or semolina from the skillet before cooking the next batch. Add a fresh sprinkle before continuing. This keeps the cooking surface cleaner and reduces the chance of already-browned grains becoming overly dark during the remaining cooking time.
Why This Easy English Muffin Recipe Works
This recipe combines a straightforward yeast dough with gentle shaping and stovetop cooking to create homemade English muffins without requiring an oven. The combination of milk, butter, and egg produces a tender, flavorful crumb, while the yeast provides the rise needed for a light and chewy interior. Slow skillet cooking allows the outside to brown while the middle cooks thoroughly.
The finished muffins are best enjoyed warm, but they are versatile enough to prepare ahead for breakfast throughout the week. Whether you prefer them with butter and jam, toasted for a simple morning meal, or filled with eggs and savory breakfast ingredients, these homemade English muffins provide a fresh alternative to packaged versions.
Once you become familiar with the dough and skillet temperature, this recipe becomes a dependable homemade breakfast staple. The process is simple enough for a first attempt, yet the final result feels special because of its golden crust, soft center, and classic nooks and crannies. Serve them warm, toast them until crisp, and enjoy them with your favorite toppings.
English Muffins
 Recipe by admin1
These homemade English muffins are soft, chewy, golden on the outside, and filled with classic nooks and crannies.
14
servings20
minutes25
minutes139
kcal1
hour30
minutes2
hours15
minutesIngredients
¾ cup milk (180ml)
½ cup water (120ml)
2 tablespoons granulated sugar
1 (.25-ounce/7g packet) active dry yeast
3 cups all-purpose flour (360g)
1 teaspoon salt
3 tablespoons butter, melted and cooled slightly (42g)
1 large egg, room temperature
Cornmeal for dusting or Semolina
Directions
- Combine the milk, water, and granulated sugar in a bowl or glass measuring cup. Warm the mixture to 110°F in the microwave.
- Add the active dry yeast and stir once. Leave the mixture for 5–7 minutes, or until a foamy layer develops on top.
- While the yeast activates, place the all-purpose flour and salt in the bowl of a stand mixer. Whisk the dry ingredients together and attach the paddle attachment.
- Stir the room-temperature egg and melted, slightly cooled butter into the milk mixture.
- Slowly pour the liquid mixture into the flour while mixing on low speed. Increase the mixer to medium-high and continue mixing for about 7 minutes, or until the dough is smooth, elastic, and pulls away from the bowl.
- Transfer the dough to a large oiled bowl and cover with plastic wrap. Leave it in a warm place until it doubles in size, approximately 1 hour. Alternatively, refrigerate the dough overnight and allow it to warm for 1 hour before continuing.
- Transfer the risen dough to a floured counter. Lightly flour the top and gently spread or pat the dough until it is just under 1 inch thick.
- Line two baking sheets with parchment paper and sprinkle them with cornmeal or semolina.
- Cut the dough into rounds using a 2½-inch round cutter. Carefully transfer the rounds to the prepared baking sheets. Gently combine and re-roll the remaining dough scraps until all the dough has been used.
- Loosely cover the baking sheets with plastic wrap and allow the muffins to rise for about 30 minutes, or until visibly puffed.
- Heat a large skillet over medium heat. Sprinkle the skillet with cornmeal or semolina, then carefully place 3–4 muffins in the pan.
- Cover the skillet and reduce the heat to medium-low. Cook for 6–8 minutes, until the bottoms are browned and the tops appear dry. Reduce the heat to low if the muffins brown too quickly.
- Carefully flip the muffins and cook for another 6–8 minutes, until the second side is browned and the muffins are cooked through.
- Remove the old cornmeal from the skillet, sprinkle the surface with fresh cornmeal or semolina, and continue cooking the remaining muffins.
- Serve the English muffins warm with butter, jam, or your favorite breakfast fillings.
Nutrition Facts
- Total number of serves: 1
- Calories: 139kcal
- Fat: 3g
- Carbohydrates: 23g
- Fiber: 1g
- Sugar: 2g
- Protein: 4g


