
Homemade vanilla ice cream is one of those classic desserts that never goes out of style. It is smooth, creamy, wonderfully rich, and filled with simple vanilla flavor that works beautifully on its own or alongside almost any dessert. While a carton of vanilla ice cream is easy to pick up from the store, making your own at home gives you a fresher texture and a more satisfying flavor.
With only five ingredients and a short amount of hands-on preparation, this easy homemade ice cream recipe is an excellent choice for summer gatherings, family desserts, or a quiet evening treat.
Why You’ll Love This Homemade Ice Cream
There is something especially enjoyable about making ice cream from scratch. You control every ingredient that goes into the mixture, and the finished dessert has a fresh, creamy quality that many packaged varieties simply cannot match. This homemade vanilla ice cream recipe keeps things uncomplicated by using heavy cream, whole milk, cane sugar, vanilla extract, and sea salt. There are no complicated flavor combinations or lengthy ingredient lists, making it approachable even if you are preparing homemade ice cream for the first time.
The texture is another reason this recipe deserves a place in your dessert collection. Heavy cream contributes richness, while whole milk keeps the mixture balanced rather than excessively heavy. Cane sugar provides sweetness and also helps create a smoother frozen texture. Vanilla extract gives the ice cream its familiar warm flavor, and a small amount of sea salt helps bring the sweetness and vanilla notes into better balance. The result is a classic vanilla ice cream that tastes delicious without needing extra toppings.
What Makes This Vanilla Ice Cream So Simple
Many traditional ice cream recipes involve preparing a custard with egg yolks, carefully tempering ingredients, and watching the mixture closely on the stove. This version takes a much easier approach. There are no eggs to separate and no custard to cook. Instead, the ingredients are gently warmed together until the sugar dissolves, then the base is thoroughly chilled before it goes into the ice cream maker.
That simple process makes this recipe particularly convenient for home cooks who want a homemade dessert without spending a large part of the day in the kitchen. The actual active preparation is short, although the mixture needs time to chill and the finished ice cream benefits from additional freezing if you prefer a firmer scoop. Planning ahead is therefore the key to getting the best texture.
Ingredients You Need
The ingredient list is short, but each component has an important role. Heavy cream provides the luxurious richness associated with classic ice cream, while whole milk adds enough liquid to keep the finished dessert creamy and scoopable. Cane sugar supplies sweetness, and vanilla extract delivers the main flavor. Sea salt may seem like a tiny addition, but it helps balance the sweetness and makes the vanilla taste more pronounced.
For the best results, use fresh dairy products and good-quality vanilla extract. Since this recipe has only five ingredients, their individual flavors are easy to notice. There is no need to add anything extra to the base. The original proportions are already designed to create a straightforward, creamy vanilla ice cream.
How to Make Homemade Vanilla Ice Cream
Warm the ice cream base
Begin by placing the heavy cream, whole milk, cane sugar, vanilla extract, and sea salt into a medium saucepan. Set the pan over medium-low heat and whisk the mixture regularly. The purpose of this stage is not to bring the dairy to a boil. Instead, gently warm the mixture until the sugar has completely dissolved and the liquid is heated through.
Keeping the heat moderate is important because dairy can scorch when exposed to excessive heat. Whisking frequently also helps distribute the sugar and other ingredients evenly throughout the base. After approximately five minutes, the mixture should be warm and smooth, with no visible sugar remaining at the bottom of the saucepan.
Chill the mixture thoroughly
Once the ice cream base has been warmed, pour it into a heatproof bowl. Cover the bowl and place it in the refrigerator for at least two hours, or leave it chilled overnight. This cooling period is an important part of the recipe rather than a step to rush through.
A properly chilled base is easier for the ice cream maker to freeze and churn. Giving it enough time in the refrigerator also makes the process more convenient because you can prepare the base in advance and churn it when you are ready. If you are making the ice cream for a particular occasion, preparing the base the night before can make the final preparation much easier.
Whisk before churning
When you are ready to make the ice cream, take the chilled mixture from the refrigerator and whisk it well. This helps ensure that the base is evenly combined before it enters the ice cream maker. Once whisked, pour the mixture into your ice cream maker and follow the manufacturer’s instructions.
Most home ice cream makers require approximately 20 to 30 minutes of churning, although the exact timing can vary depending on the machine. During this stage, the liquid base gradually becomes thicker and creamier as air is incorporated and the mixture freezes. When churning is complete, expect the ice cream to have a soft, freshly churned consistency.
Freeze for a firmer texture
Freshly churned homemade ice cream is often soft enough to serve immediately, especially if you enjoy a smooth, almost soft-serve texture. However, if you prefer traditional firm scoops, transfer the churned ice cream to an airtight container and place it in the freezer for another two to four hours.
This additional freezing time gives the ice cream a firmer consistency that is easier to scoop into bowls, cones, or dessert dishes. An airtight container is especially useful because it helps protect the ice cream from unwanted freezer odors and excessive exposure to air.
Tips for Better Homemade Vanilla Ice Cream
One of the easiest ways to improve homemade ice cream is to give the base plenty of time to become cold before churning. Although two hours is the stated chilling time, preparing the mixture the night before can be particularly convenient. A thoroughly chilled base generally works better with an ice cream maker because the machine does not have to work as hard to freeze the mixture.
Another useful tip is to avoid overheating the dairy mixture. The goal is simply to dissolve the sugar and warm the ingredients through. There is no need for a vigorous boil. Gentle heating helps maintain the quality of the dairy and keeps the preparation straightforward.
It is also worth following the instructions provided with your particular ice cream maker. Different machines have different bowl requirements, churning times, and capacity limits. Some machines require the freezer bowl to be frozen in advance, so check your manufacturer’s instructions before starting. Proper preparation of the equipment can make the churning stage much smoother.
How to Serve Vanilla Ice Cream
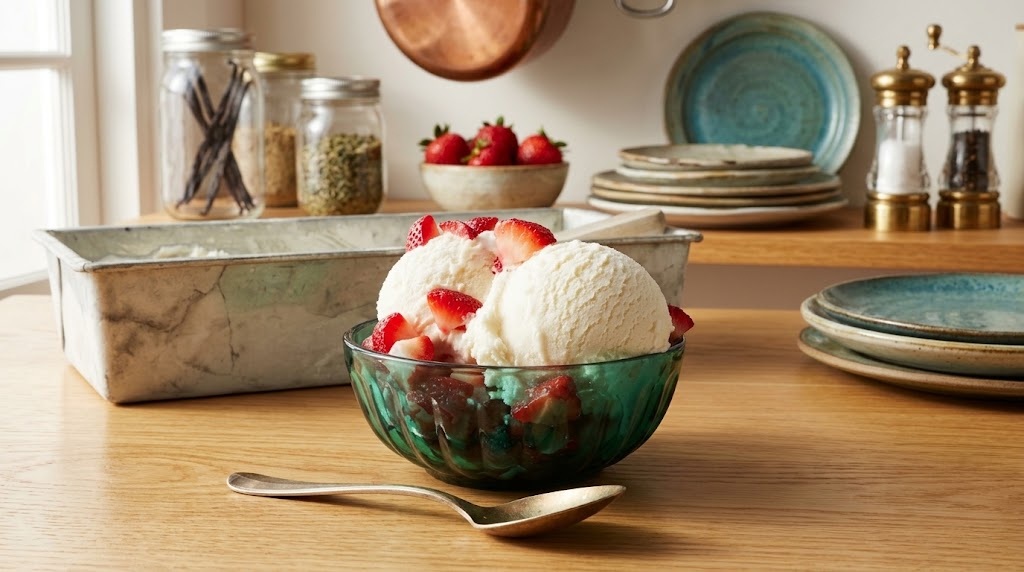
Classic vanilla ice cream is incredibly versatile. You can serve it in a simple bowl or scoop it into a crisp waffle or sugar cone. For a more decorative dessert, add fresh berries, sliced fruit, chopped nuts, chocolate sauce, caramel, or another favorite topping. Because the vanilla flavor is mild and creamy, it pairs well with a wide range of sweet flavors.
This homemade ice cream is also an excellent accompaniment to warm desserts. Serve a scoop beside apple pie, brownies, chocolate cake, fruit crisps, cobblers, or warm cookies. The contrast between a warm baked dessert and cold, creamy vanilla ice cream creates a simple combination that works for casual family meals as well as special occasions.
Easy Ways to Enjoy the Recipe
Although vanilla ice cream is delicious by itself, it can also become the foundation for many other desserts. A scoop can turn a slice of cake into an impressive dessert, while a couple of scoops can be blended into a homemade milkshake. You can also use it as the creamy element in an ice cream sundae with your favorite sauces and toppings.
For a simple summer dessert, serve the ice cream with fresh seasonal fruit. Strawberries, peaches, bananas, blueberries, and raspberries all complement vanilla beautifully. The neutral vanilla base allows the natural flavor of the fruit to remain noticeable rather than competing with it.
Storage Instructions
Proper storage helps homemade ice cream maintain its flavor and texture. After churning, transfer the ice cream to an airtight container before placing it in the freezer. Keeping the container sealed limits exposure to air and helps prevent the ice cream from picking up strong odors from other frozen foods.
According to the provided recipe, the homemade vanilla ice cream can be stored in an airtight container in the freezer for up to one month. When you want to serve it, remove the container and allow the ice cream to sit at room temperature for a few minutes if it is too firm to scoop. This short resting period should make it easier to serve without needing to alter the recipe.
Notes for the Best Results
Plan ahead
The recipe is quick to prepare, but it is not an instant dessert. The ice cream base needs at least two hours of chilling, and the churned ice cream can benefit from another two to four hours in the freezer when a firm texture is desired. Preparing the base the evening before is an easy way to make the timing more convenient.
Use an airtight container
An airtight freezer-safe container is the best choice for storing homemade ice cream. It helps preserve the creamy dessert and reduces exposure to air. Always keep the container properly covered when the ice cream is not being served.
Let firm ice cream soften slightly
Homemade ice cream can become quite firm after several hours in the freezer. Instead of trying to scoop it immediately, let it stand at room temperature for a few minutes. This allows the surface to soften slightly and makes scooping easier.
Frequently Asked Questions
Can I make this vanilla ice cream without eggs?
Yes. This particular recipe does not contain eggs. The combination of heavy cream and whole milk provides the creamy dairy base, while cane sugar and vanilla extract supply sweetness and flavor. Because there is no egg-based custard to prepare, the method is considerably simpler than many traditional homemade ice cream recipes.
How long should I chill the ice cream mixture?
The provided recipe calls for chilling the base for two hours or overnight. Either option works with the preparation schedule. Overnight chilling can be especially useful when you want to divide the work between two stages and churn the ice cream the following day.
How long does the ice cream need to churn?
The recipe indicates that most ice cream makers will take approximately 20 to 30 minutes. Since machines differ, always use the manufacturer’s instructions as your main guide. The finished mixture will generally be soft after churning and can be frozen longer if you prefer firmer ice cream.
Why is my homemade ice cream too hard?
Ice cream stored in a household freezer can become very firm, particularly after several hours or days. This does not necessarily indicate a problem with the recipe. Simply let the container sit at room temperature for a few minutes before scooping. The ice cream should soften enough to make serving easier.
How long can homemade vanilla ice cream be stored?
This recipe recommends storing the ice cream in an airtight container in the freezer for up to one month. Keeping it well covered is important for maintaining quality and reducing exposure to freezer air and odors.
Vanilla Ice Cream
 Recipe by admin1
This easy homemade vanilla ice cream is rich, creamy, smooth, and packed with classic vanilla flavor. Made with just five ingredients, it requires a short preparation period followed by chilling and churning.
4
servings30
minutes2
hours2
hours30
minutesIngredients
1½ cups heavy cream
1½ cups whole milk
⅔ cup cane sugar
2 teaspoons vanilla extract
⅛ teaspoon sea salt
Directions
- Add the heavy cream, whole milk, cane sugar, vanilla extract, and sea salt to a medium saucepan.
- Warm the mixture over medium-low heat, whisking frequently, for about 5 minutes, or until the sugar has dissolved and the mixture is warmed through.
- Pour the warm ice cream base into a heatproof bowl and cover it securely.
- Refrigerate the mixture for 2 hours or leave it chilled overnight.
- Remove the chilled base from the refrigerator and whisk it thoroughly before churning.
- Transfer the mixture to an ice cream maker and churn according to the manufacturer’s instructions. Churning typically takes about 20 to 30 minutes.
- Once churned, the ice cream will have a soft consistency and can be served immediately if desired.
- For firmer homemade ice cream, transfer it to an airtight container and freeze for an additional 2 to 4 hours.
- When ready to serve, allow very firm ice cream to sit at room temperature for a few minutes to make scooping easier.
- Store any remaining ice cream in an airtight container in the freezer for up to one month.


