
These easy homemade cheddar biscuits are a delicious choice when you want something warm, buttery, cheesy, and satisfying without spending hours in the kitchen. Unlike traditional yeast breads, these savory biscuits do not require yeast, proofing, or a long rising period.
The dough comes together quickly, and the biscuits can be baked and served warm in roughly 40 minutes. With sharp cheddar cheese, garlic, cold butter, tangy buttermilk, and a touch of honey, every biscuit has a tender center, crisp edges, flaky layers, and plenty of rich flavor. They make an excellent addition to breakfast, brunch, lunch, dinner, or a comforting family meal.
Why These Cheddar Biscuits Are Worth Making
One of the best things about this homemade cheddar biscuit recipe is its combination of simplicity and texture. The recipe uses only a small group of everyday ingredients, yet the finished biscuits have impressive layers and a rich buttery taste.
The shredded cheddar melts into the dough as the biscuits bake, creating flavorful pockets throughout the center. Garlic powder adds savory depth, while honey brings a subtle sweetness that balances the saltiness of the cheese. Because there is no yeast involved, you can prepare these biscuits whenever you need fresh bread quickly.
These biscuits are also particularly useful when you want an egg-free baking recipe. The dough relies on flour, leavening agents, butter, buttermilk, cheese, and a few seasonings rather than eggs. The result is a biscuit that feels rich and tender without being complicated.
They are especially appealing for anyone who enjoys the flavor of restaurant-style cheddar biscuits but wants to prepare a homemade version in their own kitchen. Serve them warm alongside soup, chili, roasted vegetables, grilled meats, breakfast dishes, or almost any meal that benefits from a savory baked side.
What Makes Homemade Cheddar Biscuits Flaky
The most important technique in this recipe is keeping the butter cold. Cold butter is essential for creating flaky biscuit layers because the small pieces of butter remain separate within the dough until the biscuits enter the hot oven. As the butter heats, it melts and releases steam.
That steam helps create tiny pockets of air between the layers, giving the biscuits their characteristic flaky interior while the outside develops a lightly crisp texture. If the butter becomes warm and soft before baking, the biscuits can lose some of that desirable layered structure.
For that reason, cold butter should be treated as an important part of the recipe rather than a minor detail. The butter is cut into small cubes before being incorporated into the dry ingredients.
The goal is not to completely blend the butter into the flour. Instead, you want coarse crumbs with visible pieces of flour-coated butter remaining throughout the mixture. A pastry cutter makes this process easy, while a food processor can also be used with several short pulses. The butter should remain cold while you work.
How Folding Creates Tall Biscuit Layers
After the wet ingredients are incorporated, the dough will look somewhat rough and crumbly rather than smooth. This is normal. The dough should be gently brought together on a floured work surface instead of being kneaded like traditional bread dough. Once the dough is gathered, flattening and folding it several times creates the layers that help the biscuits rise vertically during baking. This simple technique gives the finished biscuits a flaky structure without requiring complicated pastry-making skills.
The folding process is straightforward. The dough is flattened into a rectangle, one side is folded toward the center, and the opposite side is folded over it. The dough is then turned, flattened again, and folded repeatedly. These layers of dough and cold butter become more defined with each fold. It is important to handle the dough gently throughout the process because excessive mixing or kneading can make homemade biscuits heavier and less tender. The objective is to create structure while keeping the dough delicate.
Why You Should Never Twist the Biscuit Cutter
Cutting the biscuits correctly is another small detail that can make a noticeable difference. After the dough reaches its final thickness, use a 2.5- or 3-inch biscuit cutter to cut the rounds. Press the cutter straight down into the dough and lift it straight back up. Avoid twisting the cutter while cutting. Twisting can compress or seal the edges of the dough, which may prevent the biscuits from rising as fully in the oven. A clean downward cut allows the layers to expand more freely during baking.
Any remaining dough scraps can be gathered and gently re-rolled so that all of the dough is used. The recipe produces approximately eight to ten biscuits, depending on the size of the cutter. Try to handle the scraps as little as possible during this stage. The less the dough is overworked, the more tender the finished cheddar biscuits are likely to be. Once all of the rounds have been cut, they are ready to be arranged for baking.
The Secret to Tall, Soft-Centered Biscuits
For especially tall biscuits, arrange the cut pieces so they are touching or sitting snugly against one another. The biscuits support each other as they bake, encouraging them to rise upward rather than spread widely across the baking surface. A 10-inch cast iron skillet is recommended for this recipe and can also help create a crisp, nicely browned bottom. A parchment-lined baking sheet can be used as an alternative if needed.
Before the biscuits go into the oven, brush their tops with some of the reserved cold buttermilk. This simple step helps the tops develop a slightly crisp exterior while also contributing to their attractive golden appearance. The biscuits are then baked at 425°F until their tops are golden brown. Because ovens can vary, watch the biscuits closely toward the end of the stated baking period and remove them once they have developed the desired color and baked through.
How Garlic and Cheddar Build the Flavor
Cheddar cheese gives these biscuits their signature savory richness. The shredded cheese is folded into the dry mixture before the buttermilk and honey are added, helping distribute the cheese throughout the dough. As the biscuits bake, the cheddar melts into the surrounding dough, creating flavorful pockets of cheese in the finished biscuits. Garlic powder adds another layer of savory flavor without requiring fresh garlic preparation, making this recipe particularly convenient for quick baking.
The flavor is finished with a simple topping made from melted butter, garlic powder, and parsley. Brushing this mixture over the warm biscuits gives their surface an extra buttery and garlicky finish. The parsley adds a fresh-looking final touch and complements the rich cheddar flavor. Because the topping is applied while the biscuits are still warm, the butter can soak slightly into the surface, making every bite more flavorful. This finishing step is one of the easiest ways to make homemade cheddar biscuits feel extra special.
Buttermilk and Honey in the Dough
Cold buttermilk provides moisture while contributing a pleasant tang that works especially well with cheddar and garlic. The recipe uses one cup of buttermilk in the dough, with additional buttermilk reserved for brushing the biscuit tops before baking. Honey is added with the buttermilk and provides a small amount of sweetness that rounds out the savory ingredients without turning the biscuits into a sweet baked good. Together, these ingredients help create a flavorful and tender biscuit dough.
If buttermilk is not available, the supplied recipe notes that whole milk can be used instead, although the characteristic tangy flavor is best preserved with buttermilk. A homemade substitute can also be prepared by adding two teaspoons of fresh lemon juice or white vinegar to a liquid measuring cup and adding enough milk to reach one cup. After mixing, the substitute should rest for five minutes before use. The source notes that whole milk gives the best result for this substitution, while lower-fat or nondairy options may produce biscuits that are less rich or less tall.
Best Way to Prepare the Biscuit Dough
Begin by heating the oven to 425°F (218°C), giving it enough time to reach the proper temperature before the biscuits are ready. Combine the flour, baking powder, baking soda, garlic powder, and salt in a large bowl or food processor. The dry ingredients should be evenly mixed before the cold butter is introduced. Cutting the butter into the flour until coarse crumbs form is a key stage, so take care not to process the mixture until it becomes completely smooth.
Once the cheese is incorporated, create a well in the center of the dry mixture. Add one cup of buttermilk and drizzle in the honey. Gently fold the ingredients together using a large spoon or spatula. The dough should remain somewhat shaggy and crumbly, with some moist areas visible. This appearance is expected. Avoid the temptation to continue mixing until the dough looks perfectly smooth, because overworking biscuit dough can negatively affect its tenderness and flaky texture.
Baking the Cheddar Biscuits
Transfer the rough dough and loose crumbs to a floured work surface. With well-floured hands, gently bring everything together. Because the dough becomes sticky as it is handled, keeping additional flour nearby can make this stage easier. Once the dough is gathered, begin the flattening and folding process. The repeated folds build layers without requiring yeast or a traditional bread-rising period. After the final fold, flatten the dough to approximately three-quarters of an inch thick before cutting the biscuits.
Arrange the cut biscuits in a 10-inch cast iron skillet or place them close together on a parchment-lined baking sheet. The biscuits should be touching. Brush their tops with the remaining buttermilk, then bake for approximately 18 to 22 minutes, or until the tops become golden brown. Once they come out of the oven, immediately prepare the buttery garlic topping and brush it generously over the warm biscuits. These biscuits are best enjoyed warm while the cheddar is still soft and the buttery topping is fresh.
Notes for Better Results
For the best texture, keep the butter as cold as possible from the moment it is cubed until it is incorporated into the flour. The recipe notes recommend cutting the butter into half-inch cubes and placing it in the freezer for about 15 minutes before beginning. This extra step can be particularly useful in a warm kitchen, where butter can soften quickly while you prepare the remaining ingredients.
A cast iron skillet can provide a crisp bottom, making it a preferred baking option for this recipe. If the skillet is not well seasoned, lightly grease the bottom and sides with a small amount of vegetable oil or melted butter. The skillet does not have to be preheated, although the recipe notes that it may be placed in the preheated oven for 15 minutes before the shaped biscuits are arranged inside. This can be useful when you want a particularly crisp base.
The recipe also includes guidance concerning the combination of baking powder and baking soda. The supplied source notes that the recipe originally used a larger amount of baking powder without baking soda, but was changed to one tablespoon of baking powder and one-half teaspoon of baking soda. The stated reason was to help avoid a possible chemical aftertaste associated with some baking powders. For this rewritten version, the original ingredient quantities have been preserved exactly as provided.
Storage, Make-Ahead, and Freezing
Fresh cheddar biscuits are especially enjoyable warm, but leftovers can be stored for later. The supplied recipe recommends covering them tightly and keeping them at room temperature or in the refrigerator for up to five days. When you are ready to enjoy them again, warming the biscuits can restore some of their soft interior and buttery appeal. Properly covering the biscuits helps prevent them from becoming dry during storage.
The baked biscuits can also be frozen for up to three months. Thaw them at room temperature or in the refrigerator and warm them according to your preference. The dough itself can be prepared ahead as well. The supplied instructions indicate that prepared dough can be wrapped tightly and frozen for up to three months, then thawed overnight in the refrigerator before continuing with the baking process. Dough can also be refrigerated for up to two days before baking.
Serving Ideas for Cheddar Biscuits
These garlic cheddar biscuits are versatile enough to serve with many different meals. Their buttery, cheesy flavor makes them a natural companion for soups, stews, chili, roasted vegetables, and hearty dinners. They can also be placed on a brunch table alongside eggs and other breakfast favorites. Because the biscuits bake relatively quickly, they are particularly convenient when you want a fresh homemade side without committing to a yeast-based bread recipe.
For casual family dinners, serve the biscuits warm directly from the skillet or baking pan after brushing them with the garlic-butter topping. Their crisp exterior and soft, cheesy interior provide a satisfying contrast to saucy or creamy main dishes. They can also be served as a standalone savory snack when you want something warm and homemade. The combination of cheddar, garlic, butter, and parsley gives these biscuits enough flavor to be enjoyed without complicated accompaniments.
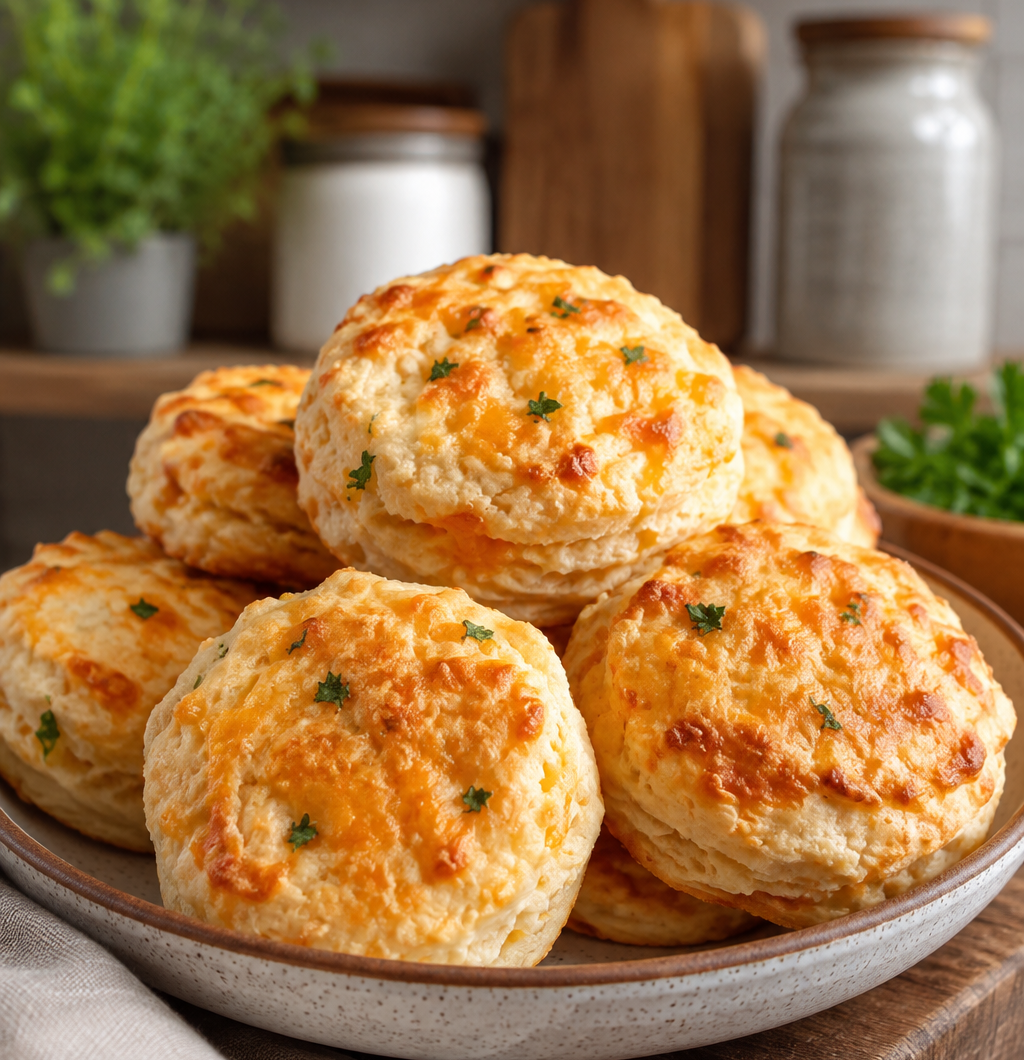
Homemade Cheddar Biscuits
 Recipe by admin1
These homemade cheddar biscuits are buttery, flaky, garlicky, and filled with shredded cheddar cheese. They bake quickly and are especially delicious when served warm with a melted butter, garlic, and parsley topping.
8
servings20
minutes20
minutes40
minutesIngredients
2 1/2 cups (313g) all-purpose flour, spooned and leveled, plus additional flour for the work surface and hands
1 tablespoon aluminum-free baking powder
1/2 teaspoon baking soda
1 teaspoon garlic powder
1 teaspoon salt
1/2 cup (8 tablespoons; 113g) unsalted butter, cubed and very cold
1 cup + 2 tablespoons (270ml) cold buttermilk, divided
2 teaspoons (14g) honey
1 cup (125g) shredded cheddar cheese
- Garlic Butter Topping
2 tablespoons (28g) unsalted butter, melted
1/4 teaspoon garlic powder
1 teaspoon dried or fresh chopped parsley
Directions
- Preheat the oven to 425°F (218°C).
- Add the flour, baking powder, baking soda, garlic powder, and salt to a large mixing bowl or food processor. Whisk the dry ingredients together, or pulse them briefly until evenly combined.
- Add the cubed, very cold butter. Use a pastry cutter or several short food-processor pulses to work the butter into the flour mixture until coarse crumbs form. Keep some small pieces of butter intact.
- Transfer the mixture to a large bowl if a food processor was used. Add the shredded cheddar cheese and gently fold it through the flour mixture.
- Make a well in the center. Pour in 1 cup (240ml) of the buttermilk and drizzle the honey over the mixture.
- Use a large spoon or spatula to gently fold the ingredients together. Stop mixing when the dough begins to come together. It should look shaggy and crumbly rather than smooth.
- Transfer the dough and any loose crumbs onto a generously floured work surface. With floured hands, gently bring the dough together, adding flour to your hands and surface as needed because the dough can become sticky.
- Flatten the dough into a rectangle approximately 3/4 inch thick. Fold one side toward the center, then fold the opposite side over it.
- Turn the dough horizontally and flatten it again to approximately 3/4 inch thick. Repeat the folding process. Turn, flatten, and fold once more, then flatten the dough into its final 3/4-inch-thick rectangle.
- Cut the dough into 2.5- or 3-inch rounds with a biscuit cutter. Press straight down without twisting the cutter. Gently re-roll the remaining scraps until all the dough has been used.
- Arrange approximately 8–10 biscuits in a 10-inch cast iron skillet or close together on a parchment-lined baking sheet. Keep the biscuits touching.
- Brush the tops with the remaining buttermilk.
- Bake for 18–22 minutes, or until the biscuit tops are golden brown.
- While the biscuits are warm, combine the melted butter, garlic powder, and parsley for the topping.
- Brush the garlic-butter mixture generously over the warm biscuits and serve.
Notes
- Keep the butter very cold for the best flaky texture. The supplied recipe recommends cubing it and placing it in the freezer for about 15 minutes before starting.
- Do not twist the biscuit cutter because twisting can seal the edges and interfere with the biscuits rising properly.
- Arrange the biscuits so they touch each other. This helps encourage them to rise taller during baking.
- Whole milk can be substituted for buttermilk, although the source recommends buttermilk for its tangy flavor. A homemade buttermilk substitute can be prepared with milk and lemon juice or white vinegar.
- If using a cast iron skillet that is not well seasoned, lightly grease it with vegetable oil or melted butter.
- Store tightly covered biscuits at room temperature or in the refrigerator for up to five days.
- Baked biscuits can be frozen for up to three months. The prepared dough can also be frozen for up to three months or refrigerated for up to two days before baking.


