
Nothing quite matches the experience of enjoying a freshly baked homemade pizza, especially when the crust comes out golden around the edges, soft through the center, and strong enough to hold all your favorite toppings. This Gluten-Free Pizza Crust is designed to make that experience possible without using wheat flour. It creates a satisfying homemade pizza base with a pleasant texture, simple preparation, and plenty of flexibility for different toppings and serving styles. Whether you are planning a classic cheese pizza, a vegetable-filled pizza, or a more substantial meal with your preferred proteins, this crust provides a dependable starting point.
Making gluten-free pizza at home can sometimes seem challenging because gluten plays an important role in traditional pizza dough. It gives wheat-based dough its familiar stretch and chew, so creating a successful alternative requires the right balance of ingredients and technique. Fortunately, gluten-free pizza does not need to involve complicated methods or difficult equipment. This recipe keeps the process straightforward by using a practical combination of pantry ingredients and an easy mixing method that does not require kneading.
The dough comes together quickly and has a softer consistency than traditional pizza dough. That is completely normal. Instead of expecting a smooth, stretchy ball of dough, the mixture is gently spread into shape by hand. This simple approach makes the recipe suitable for beginners while still producing a pizza crust with a light interior and gently crisp exterior. The result is a homemade gluten-free pizza that can be customized for family meals, casual dinners, weekend gatherings, or an easy pizza night at home.
Why This Gluten-Free Pizza Crust Is Worth Making
Many people associate gluten-free baking with dry textures, crumbly results, or complicated ingredient lists. Homemade pizza can be especially intimidating because the crust needs to be sturdy enough to support sauce and toppings while remaining enjoyable to eat. This recipe focuses on solving those common problems with a simple preparation method and a balanced combination of ingredients.
One of the main advantages is that the dough does not require traditional kneading. Once the ingredients are combined, the dough can be mixed until smooth and then pressed into the desired shape. This saves time and removes one of the steps that can make homemade pizza seem difficult. You also do not need advanced baking skills to achieve a successful result. With proper yeast activation, gentle shaping, and a short pre-bake, the crust develops the structure needed for a satisfying homemade pizza.
The finished base offers a balance between softness and crispness. The outside edges become lightly golden and crisp during baking, while the middle remains tender enough to create a pleasant bite. This combination makes the crust suitable for a variety of toppings, from a simple layer of tomato sauce and cheese to vegetables, herbs, and heartier additions.
Another benefit of preparing pizza at home is control. You can choose exactly how thick to make the crust, how much sauce to add, and which toppings best suit the meal. You can also make one large pizza for sharing or divide the dough into smaller portions for individual pizzas. This flexibility makes the recipe useful for families and for anyone who enjoys experimenting with different pizza combinations.
What Makes the Texture Different
A successful gluten-free pizza crust needs to provide structure without becoming heavy. Traditional pizza dough relies on gluten to create elasticity, but gluten-free dough behaves differently. For that reason, the dough in this recipe is expected to be softer and slightly stickier than regular wheat-based pizza dough. Trying to make it feel exactly like traditional dough by adding large amounts of extra flour can lead to a dry and dense crust.
The combination of gluten-free flour ingredients helps create the right balance. Rice flour contributes structure, while tapioca flour helps improve the texture and provides a pleasant chew. Together, they create a dough that can be spread into shape and baked into a crust that feels substantial without becoming overly dense.
Baking powder also plays an important role in the final texture. Yeast helps develop flavor and creates air within the dough, while baking powder provides additional lift as the pizza bakes. Using both helps the crust remain lighter and softer. This is particularly helpful in gluten-free baking, where the absence of gluten can otherwise result in a compact texture.
Olive oil contributes tenderness and flavor while helping the finished crust avoid an overly dry texture. Salt strengthens the overall flavor, while sugar supports yeast activation and can also encourage better browning during baking. Although the ingredient list is simple, each component contributes to the final result.
Activating the Yeast Properly
One of the most important parts of preparing this gluten-free pizza dough is activating the yeast correctly. The yeast should be combined with warm water and allowed to rest until it becomes active. After a few minutes, the mixture should develop a foamy appearance, showing that the yeast is working and ready to be incorporated into the remaining ingredients.
Water temperature matters during this step. Water that is excessively hot can damage the yeast and prevent the dough from developing properly. On the other hand, very cold water can slow the activation process. Warm water provides a more suitable environment and helps the yeast begin working effectively.
Taking a few minutes to activate the yeast can make a noticeable difference in the finished pizza crust. Properly activated yeast contributes flavor and helps create a lighter texture. If the yeast mixture does not show signs of activity, it is worth checking the freshness of the yeast before continuing. Starting with active yeast gives the dough a better chance of baking into a successful homemade crust.
Once the yeast mixture is ready, it can be combined with the dry ingredients and the remaining wet ingredients. The dough should be mixed thoroughly until the ingredients are evenly combined. Because this is a gluten-free dough, there is no need to knead it in the same way as traditional pizza dough.
Preparing the Gluten-Free Pizza Dough
The mixing process for this recipe is simple and approachable. Begin by preparing the yeast mixture according to the recipe method. While the yeast activates, the gluten-free flour blend, baking powder, and salt can be combined in a mixing bowl. Mixing the dry ingredients first helps distribute everything evenly throughout the dough.
The activated yeast mixture and olive oil are then added to the dry ingredients. Stir everything together until a smooth, soft dough forms. The dough may appear stickier than traditional pizza dough, but this texture is expected. A softer dough is easier to spread and can produce a lighter result after baking.
It can be tempting to add additional flour when the dough feels sticky, but doing so may change the texture of the finished crust. Instead, lightly flouring your hands with brown rice flour can make the shaping process easier without altering the balance of the dough itself. A little flour on the surface of your hands is usually enough to prevent excessive sticking.
The goal is to create a dough that can be gently pressed outward rather than rolled like a traditional wheat-based pizza dough. This makes the process simple and eliminates the need for complicated shaping techniques.
How to Shape the Pizza Crust
Once the dough is prepared, transfer it to a lightly greased baking tray or prepared pizza stone. Begin pressing the dough from the center outward, gradually forming a round or rectangular pizza depending on the shape of your baking surface.
Try to keep the thickness relatively even so the crust bakes consistently. A thinner crust generally develops crisper edges, while a slightly thicker base can remain softer in the middle. Keeping the dough under approximately one-quarter inch thick provides a good balance between the two textures.
If the dough begins sticking to your hands, lightly dust your fingers with brown rice flour. Avoid repeatedly mixing extra flour into the dough, as this can make the crust heavier. Work gradually and gently until the dough reaches the desired size.
There is no need for the pizza to be perfectly round. One of the enjoyable parts of homemade pizza is that it does not need to look identical to a restaurant-made pizza. The important thing is creating an even base that will bake properly and provide enough space for your chosen toppings.
Why Pre-Baking Makes a Big Difference
Pre-baking is an important step when making this gluten-free pizza crust. Before adding sauce, cheese, and toppings, the shaped dough is baked briefly on its own. This allows the surface to set and the crust to develop enough structure to support the toppings.
Without pre-baking, moisture from pizza sauce, vegetables, and other ingredients can soak directly into the soft dough. This may result in a soggy or undercooked center. Giving the crust a short initial bake helps prevent this problem and creates a stronger base for the final pizza.
During the pre-baking stage, the surface may become slightly dry and small cracks can sometimes appear. This is normal and does not mean the crust has failed. The important purpose of this stage is to allow the dough to firm up before heavier ingredients are added.
After pre-baking, the crust is ready for sauce and toppings. At this point, it can handle a generous layer of ingredients much more effectively. The final bake then melts the cheese, warms the toppings, and finishes browning the crust.
Choosing Toppings for Your Homemade Pizza
One of the best parts of making pizza from scratch is the freedom to customize every detail. Once the gluten-free crust has been pre-baked, it can be used with a wide range of toppings depending on your taste and the ingredients available in your kitchen.
A traditional combination of tomato sauce, cheese, and fresh herbs is always a reliable choice. Fresh mozzarella, mushrooms, onions, bell peppers, olives, spinach, and basil can also create a flavorful vegetable pizza. If you prefer a more filling option, grilled chicken, pepperoni, sausage, or other preferred proteins can be added.
When using vegetables with a high water content, it is helpful to avoid adding excessive amounts. Too much moisture can affect the texture of the finished pizza. Roasting or lightly cooking certain vegetables beforehand can help reduce extra moisture while adding deeper flavor.
The pre-baked crust provides enough structure to support generous toppings, but balance is still important. A moderate layer of sauce and evenly distributed toppings allows the pizza to bake more evenly. Overloading the center can make it difficult for the crust to finish properly.
You can also divide the dough into smaller portions and create individual pizzas. This is especially useful for family pizza nights because everyone can choose their own sauce, cheese, vegetables, and toppings.
A Great Choice for Family Pizza Night
Pizza has a natural way of bringing people together, and preparing it at home can turn an ordinary meal into an enjoyable activity. This gluten-free pizza crust is simple enough to prepare for a casual family dinner, while the topping options make it easy to adapt for different preferences.
Children can help spread sauce, add cheese, and arrange toppings before the pizza goes into the oven. Individual pizzas can be especially fun because each person can create their own combination. One pizza can be kept simple with cheese, while another can be filled with vegetables or more substantial toppings.
The recipe is also useful for weekends, small gatherings, and relaxed celebrations. Preparing the crust at home allows you to serve freshly baked pizza without depending on store-bought options. The aroma of pizza baking in the oven and the ability to serve it immediately can make the meal feel more special.
Because the crust is gluten-free and vegan-friendly, it can also provide a flexible starting point for different dietary preferences. The toppings can then be adjusted according to individual needs and tastes.
Make-Ahead and Freezer-Friendly Options
This recipe can be prepared in advance, making homemade pizza easier to fit into a busy schedule. The dough can be made ahead and stored in the refrigerator for a short period until you are ready to shape and bake it. Preparing some of the work in advance can make dinner preparation quicker when time is limited.
Another useful option is to pre-bake the crust ahead of time. Once it has cooled completely, it can be wrapped and stored until needed. When pizza night arrives, simply add sauce and your preferred toppings before finishing the pizza in the oven.
For longer storage, the partially baked crust can be frozen. Allow it to cool completely before wrapping it carefully in plastic wrap or aluminum foil. Place the wrapped crust inside a freezer-safe bag or airtight container to protect it from freezer exposure.
The frozen crust can be stored for up to one month. When you are ready to use it, it does not always need to be fully thawed first. Add the toppings and bake until the pizza is hot, the cheese is melted, and the edges of the crust are golden.
Having a prepared gluten-free pizza crust in the freezer can be especially convenient for busy evenings. It allows you to enjoy a homemade-style pizza without starting the entire process from the beginning.
Storing and Reheating Leftover Pizza
If you have leftover pizza, allow it to cool before transferring the slices to an airtight container. The pizza can be refrigerated for up to three days. Proper storage helps maintain the quality of both the crust and toppings.
For the best reheated texture, use an oven or air fryer. These methods help restore some of the crispness to the crust while warming the toppings evenly. The pizza should be heated until it is thoroughly warm and the crust has regained its desired texture.
A microwave can also be used when speed is the main priority, but it may produce a softer crust. If you enjoy a crisp pizza base, oven or air fryer reheating is usually the better option.
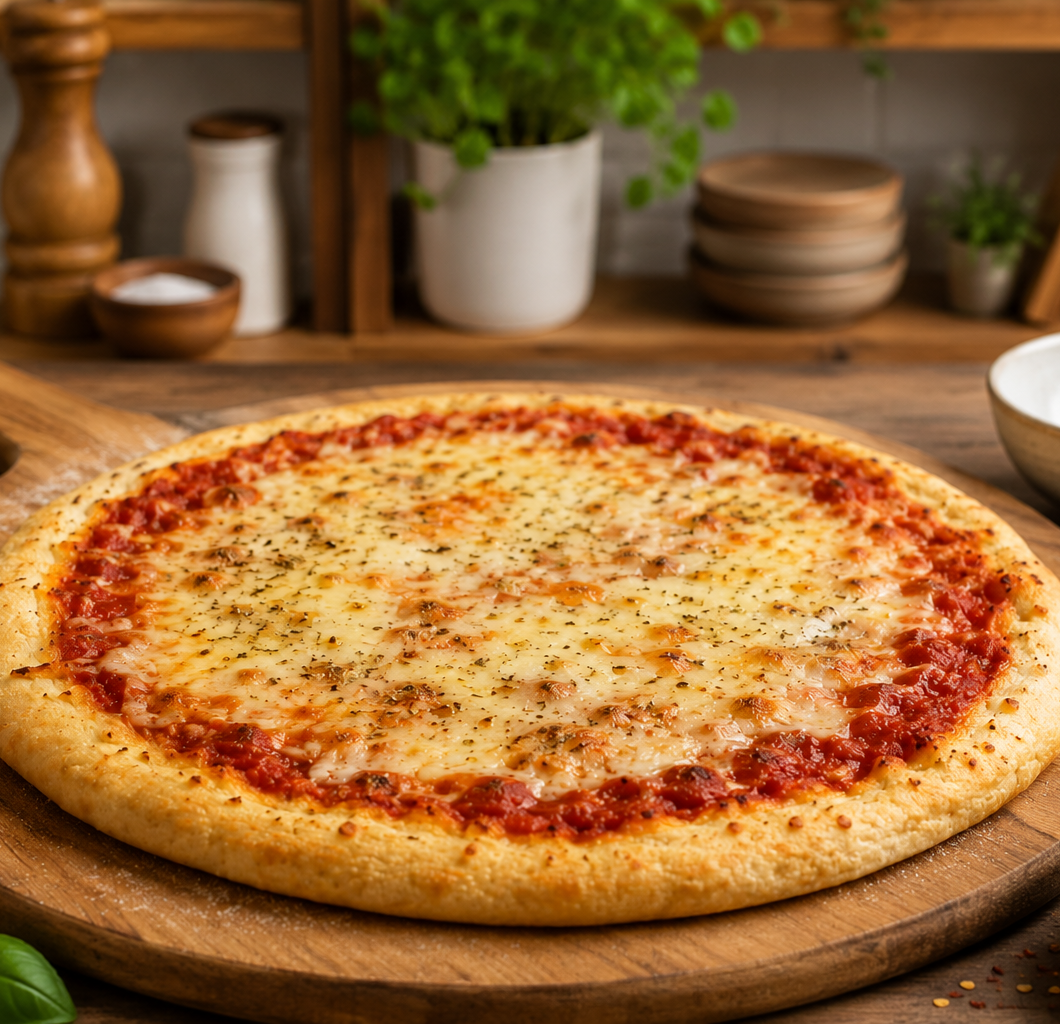
Gluten-Free Pizza Crust
 Recipe by admin1
This Gluten-Free Pizza Crust is easy to make, vegan, and perfect for homemade pizza nights. It bakes with crispy golden edges and a soft, tender center, making it an ideal base for your favorite pizza sauce and toppings.
1
servings15
minutes45
minutes170
kcal1
hourIngredients
1 Tbsp dry active yeast
1¼ cups warm water, divided
2–3 Tbsp sugar, divided
3 cups gluten-free flour blend
1 tsp salt
½ tsp baking powder
1 Tbsp olive oil
Directions
- Preheat the oven to 350°F (176°C). Mix yeast with ¾ cup warm water. Let stand for 5 minutes. Stir in 1 Tbsp sugar.
- Combine flour, salt, baking powder, and remaining sugar. Add the yeast mixture, olive oil, and remaining ½ cup water. Stir until smooth.
- Spread the dough on a greased baking sheet or pizza stone. Press into a crust less than ¼ inch thick.
- Bake for 20–25 minutes. Remove when the surface looks dry.
- Spread with pizza sauce. Add cheese and preferred toppings.
- Bake for another 15–25 minutes. Remove when the edges are golden.
- Slice and serve hot.
Nutrition Facts
- Calories: 170kcal
- Fat: 2g
- Carbohydrates: 35g
- Protein: 3g


