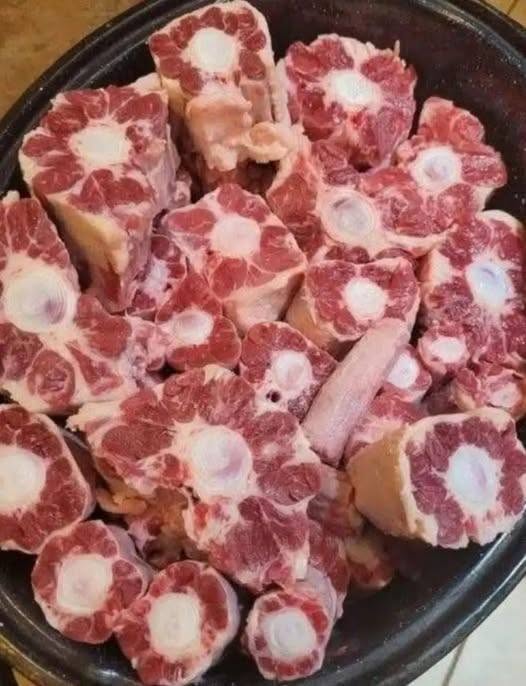
This slow-cooked rustic garlic herb pot roast is a traditional countryside-style meal designed for long, gentle cooking that transforms a tough cut of beef into an exceptionally tender and flavorful centerpiece. The recipe uses a generous amount of garlic, fresh herbs, aromatic vegetables, and a slow braising method that allows the meat to absorb deep savory flavors over many hours. The result is a comforting meal with melt-in-your-mouth beef, perfectly cooked vegetables, and a rich gravy made from the cooking liquid.
This is a very detailed version of the recipe, including preparation notes, ingredient explanations, cooking techniques, and serving suggestions.
Yield
Serves 8–10 people
Preparation Time
45 minutes
Cooking Time
7–9 hours
Total Time
Approximately 8–10 hours
Ingredients
For the Pot Roast
1 large beef chuck roast, approximately 4–5 pounds (1.8–2.3 kg)
2 tablespoons coarse sea salt
1 tablespoon freshly ground black pepper
2 teaspoons smoked paprika
2 teaspoons dried thyme
1 teaspoon dried rosemary
1 teaspoon dried oregano
3 tablespoons all-purpose flour
3 tablespoons olive oil
2 large yellow onions, sliced thickly
12 cloves garlic, peeled and lightly crushed
4 large carrots, cut into large chunks
4 celery stalks, cut into large pieces
2 parsnips, peeled and cut into chunks
2 tablespoons tomato paste
2 cups beef stock
1 cup dry red wine
2 bay leaves
4 sprigs fresh rosemary
6 sprigs fresh thyme
1 tablespoon Worcestershire sauce
1 tablespoon balsamic vinegar
For the Rustic Vegetable Layer
1 pound baby potatoes
2 large carrots, cut into thick rounds
1 large turnip, diced
1 large sweet potato, peeled and cubed
1 teaspoon salt
½ teaspoon black pepper
1 tablespoon olive oil
For the Garlic Herb Butter Finish
4 tablespoons unsalted butter
4 cloves garlic, finely minced
1 tablespoon chopped fresh parsley
1 teaspoon chopped fresh rosemary
1 teaspoon chopped fresh thyme
For the Gravy
3 cups cooking liquid from the roast
3 tablespoons butter
3 tablespoons flour
Salt to taste
Black pepper to taste
Choosing the Meat
The best cut for this recipe is beef chuck roast because it contains connective tissue and marbling that slowly break down during cooking. This process creates tenderness and richness that cannot be achieved with lean cuts.
A roast weighing between 4 and 5 pounds is ideal because it remains moist during the long cooking process while providing enough servings for a family meal or gathering.
Step 1: Prepare the Roast
Remove the beef from the refrigerator approximately 45 minutes before cooking.
Pat the roast dry thoroughly using paper towels. Removing excess moisture helps achieve a better crust during browning.
Mix together:
2 tablespoons salt
1 tablespoon black pepper
2 teaspoons smoked paprika
2 teaspoons dried thyme
1 teaspoon dried rosemary
1 teaspoon dried oregano
Rub this seasoning mixture generously over every surface of the meat.
Dust the roast lightly with flour. The flour will assist with browning and later contribute body to the cooking liquid.
Allow the seasoned roast to rest while preparing the vegetables.
Step 2: Prepare the Aromatics
Slice the onions into thick wedges.
Crush the garlic cloves gently with the side of a knife.
Cut the carrots, celery, and parsnips into large rustic pieces. Larger pieces maintain their structure throughout the lengthy cooking process.
Arrange all vegetables separately so they are ready when needed.
Step 3: Sear the Beef
Heat a large heavy Dutch oven or deep roasting pot over medium-high heat.
Add olive oil.
When the oil is hot but not smoking, place the roast into the pot.
Sear for approximately 4–5 minutes on each side.
Continue turning until all surfaces develop a rich deep brown crust.
Do not rush this stage. Proper browning develops hundreds of flavor compounds that significantly improve the final dish.
Transfer the browned roast to a large plate.
Step 4: Build the Flavor Base
Reduce heat to medium.
Add onions to the same pot.
Cook for approximately 8 minutes until softened and lightly caramelized.
Add crushed garlic.
Cook for 1 minute.
Stir in tomato paste.
Cook for 2 minutes, allowing the paste to darken slightly.
Pour in the red wine.
Scrape the bottom of the pot thoroughly using a wooden spoon.
All browned bits should dissolve into the liquid.
Allow the wine to simmer for 5 minutes until slightly reduced.
Add:
Beef stock
Worcestershire sauce
Balsamic vinegar
Bay leaves
Fresh rosemary
Fresh thyme
Bring the mixture to a gentle simmer.
Step 5: Begin the Slow Cooking Process
Return the roast to the pot.
Arrange carrots, celery, and parsnips around the meat.
The liquid should reach approximately halfway up the sides of the roast.
If needed, add additional stock.
Cover tightly with a lid.
Cook using one of the following methods.
Oven Method
Preheat oven to 300°F (150°C).
Cook for 7–8 hours.
Slow Cooker Method
Transfer contents to a large slow cooker.
Cook on low for 8–9 hours.
Avoid cooking on high if possible, as low heat produces the most tender texture.
Step 6: Prepare the Rustic Vegetable Layer
About 2 hours before the roast is finished, toss together:
Baby potatoes
Additional carrots
Turnip
Sweet potato
Olive oil
Salt
Pepper
If using an oven, place these vegetables around the roast.
If using a slow cooker, add them carefully around the meat.
Continue cooking until vegetables are fork tender.
Step 7: Test for Doneness
The roast is ready when a fork slides into the meat with almost no resistance.
The internal structure should gently pull apart without shredding aggressively.
A properly cooked chuck roast should be extremely tender while still retaining moisture.
Step 8: Make the Garlic Herb Butter
Near the end of cooking, melt butter in a small saucepan.
Add minced garlic.
Cook gently for 1 minute.
Stir in:
Fresh parsley
Fresh rosemary
Fresh thyme
Remove from heat.
Once the roast is finished, spoon this aromatic butter over the meat.
Allow it to melt into the surface naturally.
Step 9: Rest the Meat
Transfer roast to a serving platter.
Arrange vegetables around it.
Cover loosely with foil.
Allow the roast to rest for 20–30 minutes.
Resting helps the juices redistribute throughout the meat.
Step 10: Prepare the Gravy
Strain 3 cups of cooking liquid into a saucepan.
In another saucepan melt butter.
Add flour.
Cook for 2–3 minutes while stirring constantly.
Gradually whisk in the cooking liquid.
Simmer gently for 8–10 minutes.
Season with salt and pepper as needed.
The gravy should become silky, rich, and deeply flavorful.
Serving Suggestions
Serve generous slices or chunks of the roast alongside:
Mashed potatoes
Roasted root vegetables
Crusty artisan bread
Buttered green beans
Creamy polenta
Steamed peas
The gravy should be spooned over both the meat and vegetables.
Storage
Allow leftovers to cool completely.
Store in airtight containers in the refrigerator for up to 4 days.
For freezing, divide portions into freezer-safe containers and freeze for up to 3 months.
Reheating
Place roast and gravy in a covered baking dish.
Add a few tablespoons of stock.
Heat at 300°F (150°C) for approximately 25–30 minutes or until warmed through.
Avoid microwaving large portions, as this may dry out the meat.
Chef’s Notes
The flavor improves significantly after an overnight rest in the refrigerator.
Using fresh herbs rather than dried herbs provides a brighter and more aromatic result.
A combination of wine and stock creates greater depth than stock alone.
Keeping the vegetables in large pieces prevents them from breaking apart during long cooking.
Proper browning at the beginning is one of the most important steps for achieving a deeply rustic flavor.
When cooked patiently and slowly, this garlic herb pot roast develops a rich aroma, fork-tender texture, and layered savory taste that makes it one of the most satisfying traditional slow-cooked meals for family gatherings, weekend dinners, and special occasions.


