Traditional Homemade Jam Recipe (Very Detailed Version)
Making jam is one of the oldest and most satisfying methods of preserving fruit. A good jam captures the flavor, aroma, and color of fresh fruit and allows it to be enjoyed long after the harvest season. This detailed recipe explains every step from selecting fruit to storing the finished jars.
Ingredients
- 2 kilograms fresh ripe fruit (strawberries, mixed berries, peaches, apricots, plums, or any preferred fruit)
- 1.5 to 2 kilograms granulated sugar (amount depends on sweetness of fruit)
- 4 tablespoons lemon juice
- 1 cup water (if needed for less juicy fruits)
Equipment Needed
- Large heavy-bottomed cooking pot
- Wooden spoon
- Sharp knife
- Cutting board
- Measuring cups
- Clean glass jars with lids
- Ladle
- Small plate for testing jam consistency
- Clean kitchen towels
Step 1: Selecting the Fruit
Choose fruit that is ripe, fragrant, and free from mold or major bruises. Slightly underripe fruit can be mixed with ripe fruit because it contains more natural pectin, which helps the jam set properly.
Wash all fruit thoroughly under cool running water. Remove stems, leaves, pits, stones, or damaged portions. Pat dry with clean towels.
Step 2: Preparing the Fruit
Cut large fruits into small pieces. Berries may be left whole or lightly crushed depending on the desired texture.
For strawberries:
- Remove the green tops.
- Slice larger berries into halves or quarters.
For peaches or apricots:
- Remove pits.
- Peel if desired.
- Chop into small pieces.
For plums:
- Remove stones.
- Finely chop the flesh.
Place all prepared fruit into the cooking pot.
Step 3: Macerating the Fruit
Add the sugar to the fruit and mix thoroughly. Let the mixture stand for 1 to 3 hours. During this time the sugar pulls moisture from the fruit and creates a syrup.
This resting stage improves flavor development and helps the fruit cook more evenly.
The fruit should become glossy and release a significant amount of juice before cooking begins.
Step 4: Beginning the Cooking Process
Place the pot over medium heat. Stir continuously until the sugar completely dissolves.
Do not allow the mixture to boil before the sugar dissolves because undissolved sugar may cause crystallization later.
Once the sugar has dissolved, add the lemon juice and stir well.
Lemon juice serves several important purposes:
- Enhances flavor
- Balances sweetness
- Helps preserve color
- Assists the setting process
Step 5: Bringing the Mixture to a Boil
Increase heat gradually until the mixture reaches a full rolling boil.
A rolling boil is a vigorous boil that does not stop when stirred.
Continue stirring frequently to prevent sticking and scorching on the bottom of the pot.
As the jam cooks, foam may appear on the surface. Skim off excess foam using a spoon. Removing foam improves the appearance of the finished jam.
Step 6: Reducing and Thickening
Continue boiling for 20 to 45 minutes depending on the fruit used and the batch size.
During this stage:
- Water evaporates.
- Flavors become concentrated.
- Natural pectin activates.
- The mixture gradually thickens.
The fruit pieces will soften and begin to break down.
Stir regularly, especially during the final stages when the mixture becomes thicker.
Pay close attention because jam can burn quickly near the end of cooking.
Step 7: Testing for Doneness
Several methods can be used to determine whether the jam is ready.
Cold Plate Test
Before starting the recipe, place a small plate in the freezer.
When the jam appears thick, place a small spoonful on the cold plate.
Wait 30 seconds.
Push the jam gently with your finger.
If the surface wrinkles and holds its shape, the jam is ready.
If it remains runny, continue cooking and test again after a few minutes.
Spoon Test
Dip a spoon into the jam and lift it above the pot.
If the jam falls in thick sheets rather than thin drops, it is approaching the proper consistency.
Step 8: Preparing the Jars
While the jam cooks, wash jars and lids thoroughly with hot soapy water.
Rinse completely.
Sterilize jars by placing them in boiling water for 10 minutes or heating them in a low-temperature oven.
Keep jars warm until filling time to prevent cracking.
Step 9: Filling the Jars
When the jam reaches the desired consistency, remove the pot from the heat.
Allow it to stand for about 5 minutes.
Using a ladle, carefully fill the warm jars.
Leave approximately 0.5 centimeter of space at the top.
Wipe jar rims with a clean damp cloth.
Secure the lids tightly.
Step 10: Sealing the Jars
Place filled jars upright on a towel.
Allow them to cool completely at room temperature.
As the jars cool, the lids may produce a popping sound, indicating that a vacuum seal has formed.
Check each lid after cooling.
A properly sealed lid should not flex when pressed.
Step 11: Storage
Store sealed jars in a cool, dark, and dry location.
Properly sealed jam can often last up to one year.
After opening, keep the jar refrigerated and consume within several weeks.
Tips for Exceptional Jam
Use fruit at peak ripeness for the best flavor.
Avoid overcooking because excessive cooking can dull the fruit flavor and darken the color.
Stir gently but consistently to prevent burning.
Small batches generally produce better texture and flavor than very large batches.
Experiment with flavor additions such as vanilla, cinnamon, ginger, cardamom, or citrus zest.
Combining different fruits can create unique and complex flavors.
Example Mixed Berry Jam Variation
Ingredients:
- 1 kilogram strawberries
- 500 grams raspberries
- 500 grams blueberries
- 1.8 kilograms sugar
- 4 tablespoons lemon juice
Follow the same cooking process described above.
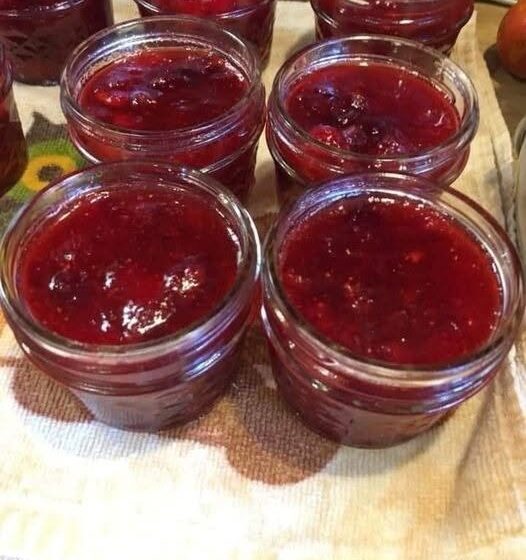
The result is a rich, deeply flavored jam with a balance of sweetness and tartness and a beautiful ruby-purple color.
A properly made jam should have a thick but spreadable texture, a bright fruit flavor, and enough sweetness to preserve the fruit while still allowing its natural taste to shine through. The process requires patience and attention, but the reward is jars of homemade jam that can be enjoyed on bread, pastries, cakes, yogurt, pancakes, or desserts throughout the year.