Fluffy and Soft Gluten-Free Bread Recipe
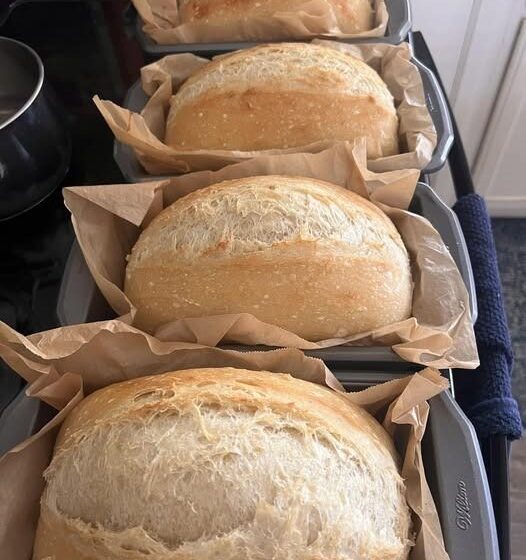
This gluten-free bread is made to be extremely soft, fluffy, light, and moist inside while keeping a delicate golden crust outside. The texture stays tender for days and works beautifully for sandwiches, toast, breakfast spreads, or simply eating warm with butter. The recipe uses simple techniques that help gluten-free dough rise properly without becoming dense or dry.
Preparation Time: 30 minutes
Rising Time: 1 hour 30 minutes
Baking Time: 45 to 55 minutes
Total Time: About 3 hours
Servings: 1 large loaf
Ingredients
For the Dry Ingredients
3 cups gluten-free all-purpose flour blend with xanthan gum included
1 cup fine white rice flour
1/2 cup tapioca starch
1/4 cup potato starch
2 tablespoons sugar
1 tablespoon baking powder
2 teaspoons instant yeast
1 1/2 teaspoons salt
For the Wet Ingredients
2 large eggs at room temperature
1 3/4 cups warm milk or warm dairy-free milk
1/4 cup plain yogurt or dairy-free yogurt
1/4 cup honey
1/4 cup melted butter or vegetable oil
1 teaspoon apple cider vinegar
1 teaspoon vanilla extract
For Extra Softness
2 tablespoons psyllium husk powder
1/4 cup warm water for mixing with psyllium
Instructions
Begin by preparing the psyllium mixture because this step helps create elasticity and softness in gluten-free bread. Place the psyllium husk powder into a small bowl and pour in the warm water. Stir immediately. Within a minute it will begin forming a thick gel. Let it rest while preparing the remaining ingredients.
In a very large mixing bowl combine the gluten-free flour blend, white rice flour, tapioca starch, potato starch, sugar, baking powder, instant yeast, and salt. Stir thoroughly for several minutes so every ingredient becomes evenly distributed. Proper mixing at this stage helps prevent uneven texture later.
In another bowl whisk the eggs until smooth and slightly frothy. Add the warm milk, yogurt, honey, melted butter, apple cider vinegar, and vanilla extract. Whisk again until the mixture becomes creamy and fully blended.
Add the psyllium gel into the wet ingredients and whisk well. The mixture may appear thick and stretchy, which is completely normal and important for creating soft bread texture.
Slowly pour the wet mixture into the bowl of dry ingredients. Mix using a stand mixer with a paddle attachment for about 5 to 7 minutes on medium speed. If mixing by hand, stir vigorously with a wooden spoon for several minutes until no dry flour remains. Gluten-free dough is much wetter than regular bread dough and will resemble thick cake batter rather than traditional kneadable dough.
Grease a loaf pan generously with butter or oil. Transfer the dough into the pan and smooth the top using a spatula dipped in water. Lightly cover the pan with plastic wrap or a clean towel.
Place the dough in a warm area for rising. Allow it to rise for about 60 to 90 minutes or until it has noticeably expanded and risen near the top of the pan. Gluten-free dough usually rises once rather than twice, and overproofing can make it collapse, so watch carefully.
Preheat the oven to 375 degrees Fahrenheit while the dough is finishing its rise.
Before baking, lightly brush the top with milk or melted butter for a softer crust. You may sprinkle a little rice flour on top if desired.
Bake the bread for 45 to 55 minutes. The top should become golden brown and the loaf should sound hollow when gently tapped. If the top browns too quickly, loosely cover it with foil during the final baking time.
Remove the bread from the oven and allow it to cool in the pan for 10 minutes. Then carefully transfer it to a wire rack. Let the loaf cool completely before slicing because gluten-free bread continues setting as it cools.
Texture Tips
Using warm ingredients helps the yeast activate properly and encourages a taller rise.
Psyllium husk is extremely important because it replaces some of the elasticity normally provided by gluten.
Do not add too much extra flour even if the dough looks sticky. A wetter dough creates softer bread.
Mixing longer than traditional bread improves structure in gluten-free recipes.
Storing the Bread
Keep the bread wrapped tightly at room temperature for up to 2 days.
Store in the refrigerator for up to 1 week.
For longer storage, slice the loaf and freeze the slices individually. Toast directly from frozen for best texture.
Flavor Variations
For sweeter breakfast bread, add cinnamon and raisins.
For sandwich bread, add herbs such as oregano or rosemary.
For richer flavor, replace part of the milk with cream.
For extra softness, add 2 tablespoons mashed potato to the wet ingredients.
Serving Ideas
Serve warm with butter and honey.
Use for grilled cheese sandwiches.
Toast and top with avocado.
Make French toast using thick slices.
Serve with soups and stews.
Common Mistakes to Avoid
Using cold ingredients may slow yeast activity and produce dense bread.
Skipping psyllium or xanthan gum may cause crumbly texture.
Cutting the bread while hot can make it gummy inside.
Adding too much flour may create dry and heavy bread.
Nutritional Estimate Per Slice
Calories: About 180
Protein: 4 grams
Carbohydrates: 32 grams
Fat: 5 grams
Fiber: 3 grams
This recipe creates a bakery-style gluten-free bread that stays fluffy, soft, tender, and moist while avoiding the dryness often found in gluten-free baking. The interior remains light and airy with a delicate crumb, making it suitable for everyday use as well as special meals and breakfast dishes.