Condensed Milk Recipe (Detailed Version)
Condensed milk is a thick, sweet milk product made by slowly reducing milk and dissolving sugar into it. It is commonly used in desserts, cakes, candies, ice creams, puddings, and beverages. Making it at home requires only a few ingredients and patience during cooking.
Ingredients
- 4 cups (1 liter) whole milk
- 1¼ to 1½ cups granulated sugar
- 2 tablespoons unsalted butter (optional, for richness)
- 1 teaspoon vanilla extract (optional, for flavor)
Equipment
- Heavy-bottom saucepan or pot
- Wooden spoon or silicone spatula
- Measuring cups
- Fine strainer (optional)
- Clean glass jar or airtight container
Preparation Process
Begin by selecting a heavy-bottomed saucepan. This helps prevent the milk from scorching during the long cooking process. Pour the milk into the saucepan and place it over medium heat.
Allow the milk to warm gradually. Stir occasionally so that a skin does not form on the surface and the milk does not stick to the bottom of the pan. Once the milk becomes hot but not boiling vigorously, add the sugar.
Stir continuously until all of the sugar has completely dissolved. At this stage, the mixture should look smooth and uniform without any visible sugar crystals.
Reduce the heat to low. The goal is to slowly evaporate water from the milk rather than rapidly boiling it. A gentle simmer is ideal. Small bubbles should occasionally appear around the edges of the pan.
Continue cooking for approximately 45 to 90 minutes, depending on the heat level, the width of the pan, and the type of milk used. During this time, stir every few minutes. As the milk reduces, it will gradually become thicker and creamier.
As evaporation continues, the color of the milk will slowly change from bright white to a light cream or pale ivory shade. This color change is normal and contributes to the characteristic appearance of condensed milk.
When the mixture has reduced to about one-third to one-half of its original volume, watch it carefully. The liquid will begin coating the spoon more noticeably. Stir more frequently during this stage because thicker mixtures can burn easily.
If using butter, add it near the end of cooking. Stir until fully melted and incorporated. Butter contributes a smoother texture and richer flavor.
Remove the saucepan from the heat when the condensed milk is thick enough to coat the back of a spoon. Keep in mind that the mixture will continue thickening as it cools.
If desired, add vanilla extract after removing the pan from the heat. Stir thoroughly.
Allow the condensed milk to cool for 10 to 15 minutes. If a very smooth texture is preferred, strain the mixture through a fine strainer before storing.
Transfer the cooled condensed milk into a clean glass jar or airtight container.
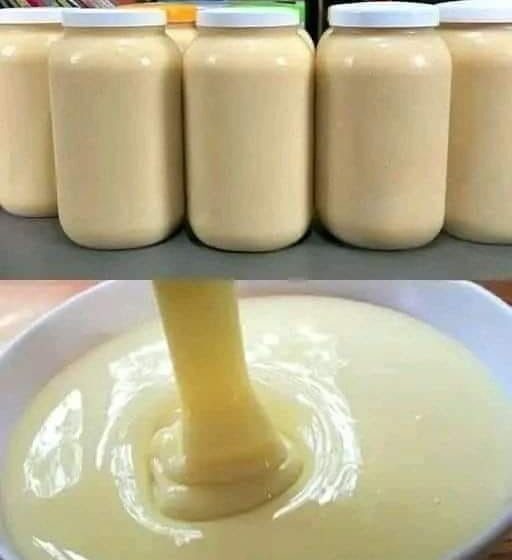
How to Know It Is Ready
Several signs indicate that the condensed milk has reached the correct consistency:
- The volume has reduced significantly.
- The mixture looks creamy and glossy.
- It coats the back of a spoon.
- A line drawn through the coating on the spoon remains visible for a few seconds.
- The color has become slightly cream-colored rather than pure white.
Storage Instructions
Store homemade condensed milk in a sealed container in the refrigerator. It typically remains fresh for 1 to 2 weeks when properly refrigerated.
Always use a clean spoon when removing condensed milk from the container to maximize freshness and reduce the risk of contamination.
Uses of Condensed Milk
Homemade condensed milk can be used in many recipes, including:
- Fudge
- Caramel sauces
- Ice cream
- Milkshakes
- Coffee and tea
- Cakes
- Cupcakes
- Cookies
- Puddings
- Cheesecakes
- Truffles
- Sweet breads
- Dessert fillings
- Fruit desserts
Extra Thick Bakery-Style Condensed Milk
For a richer and thicker version similar to many bakery products, use:
- 4 cups whole milk
- 1¾ cups sugar
- 3 tablespoons butter
- ¼ teaspoon baking soda
Cook the mixture slowly for 60 to 90 minutes until heavily reduced. The resulting condensed milk will be thicker, richer, and slightly darker in color.
Common Mistakes to Avoid
Do not cook over high heat because the milk may burn before enough water evaporates.
Do not stop stirring for long periods, especially during the final stages of cooking.
Do not over-reduce the mixture. Extremely thick condensed milk may become difficult to pour after cooling.
Do not cover the pot while cooking because evaporation is necessary for thickening.
Do not add vanilla at the beginning of cooking, as much of its flavor may be lost during the long simmering process.
Yield
Starting with 4 cups (1 liter) of milk generally produces approximately 1 to 1½ cups of condensed milk, depending on how much liquid is evaporated.
This homemade condensed milk has a rich, creamy texture and sweet flavor comparable to store-bought sweetened condensed milk and can be used in a wide variety of desserts and beverages.