Candy Wall Celebration Cake
Introduction
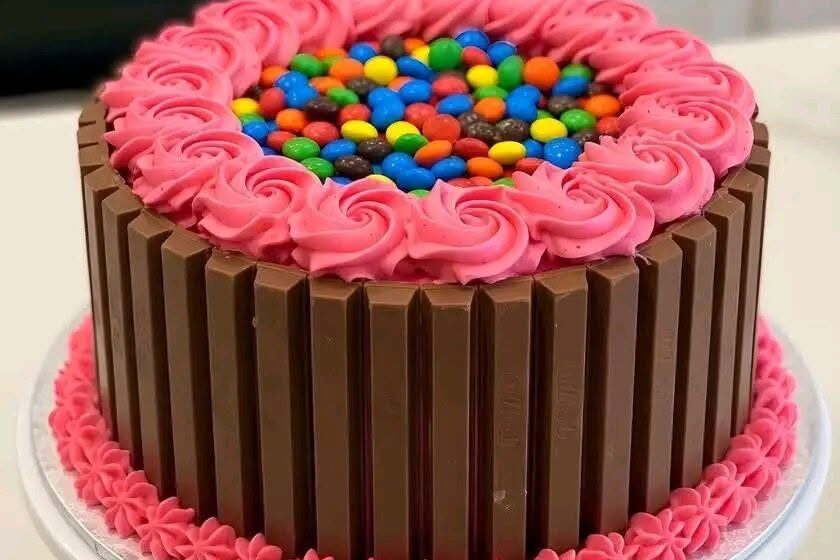
A Candy Wall Celebration Cake is an impressive party cake designed to be the centerpiece of birthdays, anniversaries, school events, weddings, baby showers, and large family gatherings. This cake combines soft, flavorful cake layers with rich frosting and an eye-catching decorative candy wall that completely covers the sides and often extends across the top. The result is a colorful, festive dessert that looks like a wall made entirely of candy.
This recipe creates a large celebration cake suitable for approximately 20–30 servings, depending on slice size. The recipe includes detailed instructions for baking the cake layers, preparing the frosting, assembling the cake, building the candy wall decoration, and storing the finished cake.
Yield
1 large celebration cake
Serves 20–30 people
Preparation Time
Preparation: 2 hours
Baking: 35–45 minutes
Cooling: 2 hours
Assembly and Decoration: 1–2 hours
Total Time: Approximately 6–7 hours
Cake Ingredients
Dry Ingredients
4½ cups all-purpose flour
3 tablespoons baking powder
1 teaspoon baking soda
1 teaspoon salt
Wet Ingredients
2 cups unsalted butter, softened
3 cups granulated sugar
8 large eggs, room temperature
2 tablespoons vanilla extract
1 tablespoon almond extract (optional)
2 cups whole milk
1 cup sour cream
Optional Flavor Additions
2 tablespoons lemon zest
2 tablespoons orange zest
1 cup mini chocolate chips
1 cup rainbow sprinkles
Buttercream Frosting Ingredients
3 cups unsalted butter, softened
12 cups powdered sugar, sifted
6–8 tablespoons heavy cream
2 tablespoons vanilla extract
¼ teaspoon salt
Food coloring of choice
Candy Wall Decoration Ingredients
2–3 kilograms assorted candies
Choose a wide variety such as:
Chocolate-coated candies
Gummy bears
Gummy worms
Candy-coated chocolates
Fruit chews
Jelly candies
Marshmallows
Chocolate bars cut into pieces
Wafer sticks
Candy pearls
Chocolate buttons
Licorice pieces
Caramel candies
Lollipops
Rock candy
Rainbow belts
Chocolate-covered nuts
Sugar-coated gummies
Mini cookies
Chocolate truffles
Decorative sprinkles
Edible glitter
Additional Assembly Ingredients
1 cup simple syrup
2 tablespoons vanilla extract
½ cup fruit jam (optional)
1 cup chocolate ganache (optional)
Equipment
Three 9-inch cake pans
Mixing bowls
Electric mixer
Offset spatula
Cake turntable
Cooling racks
Parchment paper
Cake board
Bench scraper
Large piping bags
Food-safe gloves
Cake dowels if transporting
Step 1: Prepare the Cake Pans
Grease three 9-inch cake pans thoroughly with butter.
Line the bottoms with parchment paper.
Lightly dust with flour.
Preheat the oven to 175°C (350°F).
Step 2: Mix the Dry Ingredients
In a large bowl combine:
4½ cups flour
3 tablespoons baking powder
1 teaspoon baking soda
1 teaspoon salt
Whisk thoroughly until evenly mixed.
Set aside.
Step 3: Cream Butter and Sugar
Place softened butter into a large mixing bowl.
Beat for approximately 3 minutes until smooth.
Gradually add sugar.
Continue beating for 5–7 minutes until the mixture becomes pale, fluffy, and significantly increased in volume.
Proper creaming helps create a soft and tender cake texture.
Step 4: Add Eggs
Add eggs one at a time.
Mix well after each addition.
Scrape down the bowl frequently.
Add vanilla extract and almond extract.
Mix until fully incorporated.
Step 5: Combine Milk and Sour Cream
In a separate bowl combine:
Whole milk
Sour cream
Whisk until smooth.
Step 6: Finish the Batter
Add one-third of the flour mixture to the butter mixture.
Mix gently.
Add one-third of the milk mixture.
Continue alternating until all ingredients are incorporated.
Do not overmix.
If using chocolate chips or sprinkles, fold them in at this stage.
Step 7: Fill the Cake Pans
Divide the batter evenly among the prepared pans.
Smooth the tops.
Tap the pans lightly to remove air bubbles.
Step 8: Bake
Bake for 35–45 minutes.
The cakes are done when:
The tops spring back lightly when touched.
A toothpick inserted in the center comes out clean.
Internal temperature reaches approximately 98–99°C.
Step 9: Cool the Cakes
Allow cakes to cool in pans for 15 minutes.
Turn them onto cooling racks.
Remove parchment paper.
Cool completely before frosting.
Warm cakes can melt frosting and destabilize decorations.
Step 10: Prepare the Buttercream
Beat softened butter for 5 minutes until very smooth.
Gradually add powdered sugar.
Mix on low speed initially.
Add:
Vanilla extract
Salt
Heavy cream
Continue beating for 8–10 minutes.
The frosting should become light, fluffy, and easy to spread.
Color frosting as desired.
Popular celebration colors include:
Pink
Blue
Purple
Yellow
White
Rainbow combinations
Step 11: Level the Cakes
Use a serrated knife to trim any domed tops.
Create flat surfaces for stacking.
Reserve cake scraps for snacks or cake pops.
Step 12: Prepare Cake Soaking Syrup
Combine:
1 cup simple syrup
2 tablespoons vanilla extract
Brush lightly over each cake layer.
This helps maintain moisture for several days.
Step 13: Assemble the Layers
Place the first cake layer on a cake board.
Spread a thick layer of buttercream.
Optional additions:
Chocolate ganache
Fruit jam
Chocolate chips
Candy pieces
Place the second cake layer on top.
Repeat.
Add the final layer.
Check alignment carefully.
Step 14: Apply the Crumb Coat
Spread a thin layer of frosting over the entire cake.
Seal in crumbs.
Refrigerate for 30 minutes.
This creates a clean surface for final decorating.
Step 15: Final Frosting Layer
Apply a generous layer of buttercream.
Use an offset spatula and bench scraper to smooth the cake.
Ensure the frosting layer is thick enough to support heavy candy decorations.
Chill for another 20–30 minutes.
Step 16: Create the Candy Wall
This is the signature decoration.
Begin from the bottom edge of the cake.
Press candies gently into the frosting.
Work upward in rows.
Alternate colors, shapes, and textures.
Create visual balance by distributing candies evenly.
Combine:
Soft candies
Chocolate candies
Chewy candies
Crunchy candies
Large statement candies
Small filler candies
Continue until the entire side of the cake resembles a colorful candy wall.
Step 17: Build Decorative Patterns
You may arrange candies in:
Rainbow stripes
Spiral patterns
Checkerboard designs
Ombre color gradients
Flower shapes
Heart shapes
Starburst designs
Name initials
Birthday numbers
Celebration messages
Step 18: Decorate the Top
Pipe decorative buttercream swirls.
Add candy clusters.
Arrange large candies around the perimeter.
Place lollipops vertically.
Add wafer sticks for height.
Create a dramatic candy explosion effect by concentrating decorations in one area and allowing them to cascade down the side.
Step 19: Add Premium Finishing Touches
Sprinkle with:
Edible glitter
Candy pearls
Colored sugar
Chocolate shavings
Gold dust
Silver dragees
Rainbow sprinkles
These details create a luxurious celebration appearance.
Step 20: Stabilize the Cake
If the cake will be transported:
Insert cake dowels through the center.
Chill thoroughly.
Use a sturdy cake box.
Keep away from direct sunlight and excessive heat.
Flavor Variations
Chocolate Candy Wall Cake
Replace 1 cup flour with cocoa powder.
Use chocolate buttercream.
Decorate primarily with chocolate candies.
Strawberry Candy Wall Cake
Add strawberry puree to the batter.
Use pink frosting.
Decorate with strawberry-flavored candies.
Vanilla Rainbow Candy Wall Cake
Keep the cake vanilla-flavored.
Use brightly colored candies.
Add rainbow sprinkles throughout the batter.
Cookies and Candy Celebration Cake
Mix crushed cookies into frosting.
Alternate cookie pieces and candies on the wall.
Caramel Candy Wall Cake
Add caramel filling.
Decorate with caramel candies and chocolate pieces.
Professional Decorating Tips
Use candies of different sizes.
Place larger candies first.
Fill gaps with smaller candies.
Keep color distribution balanced.
Work while frosting remains slightly soft.
Chill frequently during decorating if the room is warm.
Avoid overly heavy candies near the top edge.
Use fresh candies for the brightest appearance.
Storage
Store covered at room temperature for up to 24 hours.
Refrigerate for up to 5 days.
Bring to room temperature before serving.
Freeze unfrosted cake layers for up to 3 months.
Serving Suggestions
Serve with:
Vanilla ice cream
Chocolate ice cream
Fresh fruit
Milkshakes
Hot chocolate
Coffee
Tea
Fruit punch
Sparkling beverages
The Candy Wall Celebration Cake is a spectacular showpiece featuring soft cake layers, creamy frosting, and a vibrant wall of colorful candies that creates a memorable dessert for large celebrations and special occasions. Its combination of flavor, texture, and visual impact makes it ideal for birthdays, weddings, anniversaries, graduation parties, holiday gatherings, and festive events where a dramatic centerpiece cake is desired.


