Roulé Chocolat Fourré à la Crème Noisette
This luxurious chocolate Swiss roll filled with a rich hazelnut cream combines a light cocoa sponge, a silky hazelnut filling, and an elegant presentation. The recipe below is intentionally detailed and comprehensive to guide every stage of preparation, from ingredient selection to professional finishing techniques.
Introduction
A roulé chocolat fourré crème noisette is a classic rolled sponge cake made with a flexible chocolate genoise-style sponge and filled with a creamy hazelnut-flavored filling. The success of this dessert depends on creating a sponge that is light enough to roll without cracking while maintaining enough structure to hold a generous layer of cream.
Yield
Serves 10 to 12 people
Preparation Time
Preparation: 1 hour 15 minutes
Baking: 10 to 12 minutes
Cooling and Assembly: 2 hours
Total Time: Approximately 3 hours 30 minutes
Equipment
Large mixing bowls
Electric mixer or stand mixer
Fine mesh sieve
Rubber spatula
Whisk
Baking tray approximately 30 x 40 cm
Parchment paper
Clean kitchen towel
Offset spatula
Cooling rack
Sharp serrated knife
Ingredients for the Chocolate Sponge
6 large eggs at room temperature
180 g granulated sugar
1 teaspoon pure vanilla extract
120 g cake flour
35 g unsweetened cocoa powder
1 teaspoon baking powder
1 pinch fine salt
40 g unsalted butter, melted and cooled
2 tablespoons milk
Ingredients for the Hazelnut Cream Filling
250 g mascarpone cheese, cold
250 ml heavy cream, cold
120 g hazelnut spread
80 g roasted hazelnuts, finely ground
50 g powdered sugar
1 teaspoon vanilla extract
1 pinch salt
Ingredients for the Chocolate Syrup
80 ml water
40 g sugar
15 g cocoa powder
1 teaspoon vanilla extract
Ingredients for the Chocolate Ganache Coating
200 g dark chocolate, finely chopped
180 ml heavy cream
20 g unsalted butter
Decoration
50 g roasted hazelnuts, chopped
Chocolate curls
Cocoa powder for dusting
Optional gold leaf for special occasions
Step 1: Preparing the Baking Tray
Preheat the oven to 180°C.
Line the baking tray with parchment paper. Ensure the paper extends slightly beyond the edges to facilitate removal after baking. Lightly grease the parchment paper with butter or baking spray.
Step 2: Preparing the Dry Ingredients
In a medium bowl, combine the cake flour, cocoa powder, baking powder, and salt.
Sift the mixture at least twice. This process removes lumps and introduces air, resulting in a lighter sponge texture.
Set aside.
Step 3: Preparing the Egg Mixture
Place the eggs, sugar, and vanilla extract into a large mixing bowl.
Using an electric mixer, beat on high speed for 8 to 10 minutes.
The mixture should become very pale, thick, and voluminous. When the whisk is lifted, the batter should fall in ribbons that remain visible on the surface for several seconds.
This stage is essential because the air incorporated here provides most of the sponge’s structure.
Step 4: Folding in the Dry Ingredients
Add one-third of the sifted dry ingredients.
Using a large spatula, fold gently from the bottom upward.
Rotate the bowl as you work.
Repeat with the remaining dry ingredients in two additions.
Avoid vigorous stirring, which would deflate the batter.
Step 5: Incorporating Butter and Milk
Mix the melted butter with the milk.
Transfer a small portion of the batter into the butter mixture and stir gently.
This intermediate step makes it easier to incorporate the fat without collapsing the foam.
Fold the butter mixture back into the main batter carefully.
Continue folding until no streaks remain.
Step 6: Baking the Sponge
Pour the batter into the prepared tray.
Spread evenly using an offset spatula.
Tap the tray lightly on the counter to remove large air bubbles.
Bake for 10 to 12 minutes.
The sponge should spring back lightly when touched.
Avoid overbaking because a dry sponge tends to crack during rolling.
Step 7: Preparing the Rolling Towel
While the cake bakes, spread a clean kitchen towel on the work surface.
Dust the towel lightly with cocoa powder and a small amount of powdered sugar.
This prevents sticking and helps create a beautiful exterior finish.
Step 8: Rolling the Warm Cake
Immediately after removing the cake from the oven, invert it onto the prepared towel.
Carefully peel away the parchment paper.
Starting from one short side, roll the cake together with the towel.
Roll firmly but gently.
Allow it to cool completely in this rolled position.
Cooling in the rolled shape trains the sponge to maintain flexibility.
Step 9: Preparing the Hazelnuts
Place the roasted hazelnuts on a cutting board.
Chop finely or pulse briefly in a food processor.
For maximum flavor, lightly toast the nuts in a dry pan for 2 to 3 minutes before grinding.
Allow them to cool completely.
Step 10: Preparing the Hazelnut Cream
In a chilled bowl, whip the heavy cream until soft peaks form.
In another bowl, combine mascarpone, hazelnut spread, powdered sugar, vanilla extract, ground hazelnuts, and salt.
Mix until smooth.
Fold the whipped cream into the mascarpone mixture gradually.
The finished cream should be light, smooth, and stable.
Refrigerate while preparing the syrup.
Step 11: Preparing the Chocolate Syrup
Combine water, sugar, and cocoa powder in a small saucepan.
Bring to a gentle simmer.
Stir continuously until smooth.
Remove from heat.
Add vanilla extract.
Allow to cool completely.
Step 12: Unrolling the Cake
Carefully unroll the cooled sponge.
Minor surface cracks are normal.
Brush the entire surface lightly with chocolate syrup.
This adds moisture and intensifies the chocolate flavor.
Allow the syrup to absorb for several minutes.
Step 13: Filling the Cake
Spread the hazelnut cream evenly over the sponge.
Leave approximately 1.5 cm uncovered around the edges.
This prevents excess filling from escaping during rolling.
Use an offset spatula to create a smooth, uniform layer.
Step 14: Rolling the Filled Cake
Beginning from the same side used previously, roll the sponge tightly.
Apply steady pressure to maintain a compact spiral.
Wrap the roulé in plastic wrap.
Refrigerate for at least one hour.
This chilling period stabilizes the filling and improves slicing quality.
Step 15: Preparing the Ganache
Place the chopped chocolate in a heatproof bowl.
Heat the cream until just below boiling.
Pour the hot cream over the chocolate.
Allow to stand for two minutes.
Stir slowly until smooth.
Add the butter and mix until glossy.
Let the ganache cool slightly until spreadable.
Step 16: Coating the Roulé
Remove the chilled roulé from the refrigerator.
Trim both ends neatly using a sharp serrated knife.
Transfer the roulé to a serving platter.
Spread the ganache evenly across the surface.
Create decorative swirls using an offset spatula.
Step 17: Decorating
Press chopped roasted hazelnuts along the sides.
Scatter additional hazelnuts across the top.
Add chocolate curls for elegance.
Dust lightly with cocoa powder.
For a luxurious presentation, place small pieces of edible gold leaf at intervals.
Professional Tips for Success
Always use room-temperature eggs for maximum volume.
Sift dry ingredients thoroughly.
Do not overmix after adding flour.
Roll the sponge while warm.
Allow adequate chilling before slicing.
Use high-quality cocoa powder and chocolate for superior flavor.
Toast hazelnuts before grinding to intensify their aroma.
Storage
Store the roulé in an airtight container in the refrigerator.
It remains fresh for up to 4 days.
For best texture, remove from the refrigerator 15 to 20 minutes before serving.
Freezing Instructions
The assembled roulé may be frozen for up to 2 months.
Wrap first in plastic wrap and then in aluminum foil.
Thaw overnight in the refrigerator before serving.
Serving Suggestions
Serve with freshly brewed coffee.
Pair with hot chocolate for an indulgent dessert experience.
Accompany with vanilla ice cream.
Garnish with fresh raspberries or strawberries for a pleasant contrast to the rich chocolate and hazelnut flavors.
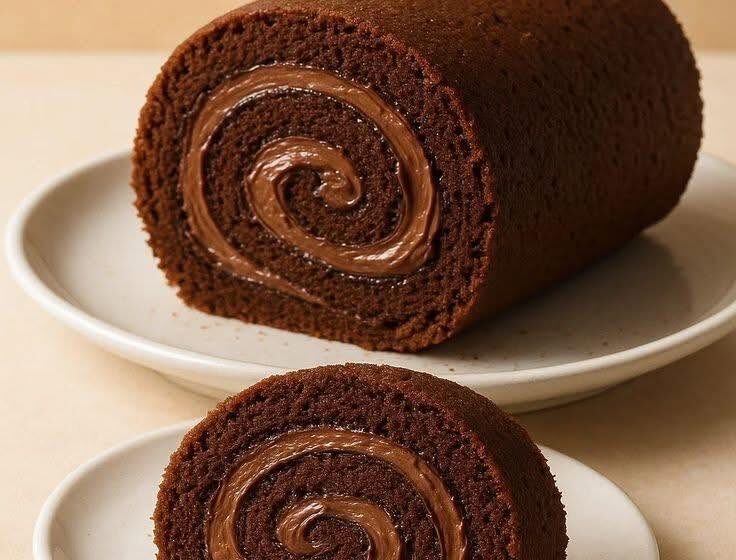
The finished roulé chocolat fourré à la crème noisette should feature a soft, moist chocolate sponge wrapped around a generous layer of silky hazelnut cream, all covered in a glossy chocolate ganache and finished with crunchy roasted hazelnuts. The result is an elegant pastry with deep chocolate notes, a pronounced roasted hazelnut aroma, and a beautiful spiral pattern in every slice.