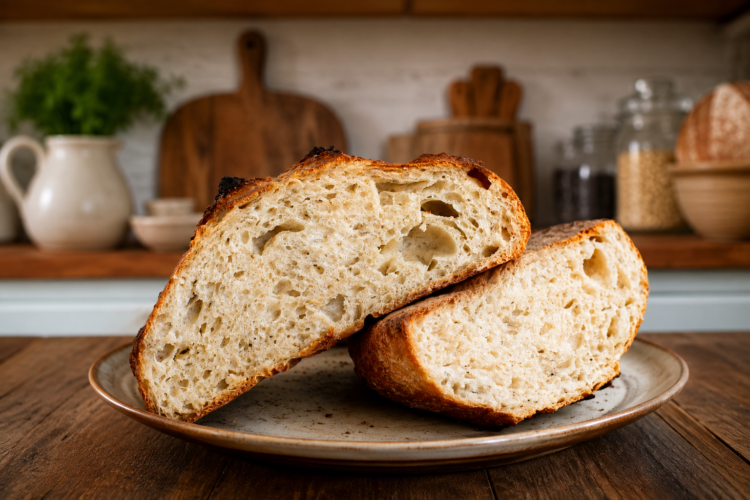
Roasted garlic rosemary sourdough bread is the kind of homemade loaf that makes a simple meal feel special. The combination of naturally fermented sourdough, sweet roasted garlic, and fresh rosemary creates a deeply savory flavor with a fragrant herbal finish.
Roasting the garlic softens its sharpness and brings out a mellow sweetness, while rosemary adds a fresh, aromatic note that works beautifully with the hearty character of artisan sourdough.
This recipe is especially appealing if you enjoy rustic homemade bread with a flavorful interior rather than a plain loaf. The roasted garlic becomes soft enough to blend naturally into the dough, creating pockets of rich flavor throughout the bread.
Fresh rosemary is added during the dough-strengthening process, allowing its aroma to spread through the loaf without overwhelming the garlic. The finished bread has the character of a bakery-style sourdough while offering the satisfying flavor of a homemade garlic and herb bread.
What Makes Roasted Garlic So Good in Sourdough
Roasting garlic changes its flavor dramatically. Instead of the sharp, pungent taste associated with raw garlic, roasted cloves become tender, mellow, and slightly sweet. In this bread, the roasted garlic is mashed before being incorporated into the dough, making it easier to distribute throughout the loaf.
The source recipe uses three garlic bulbs, roasted with olive oil and a little salt until the cloves become very soft and caramelized.
The roasted garlic can also be prepared ahead of time, which makes the overall bread-making process easier to manage. Once cooled, the cloves can be squeezed from the bulbs, mashed with a fork, and stored until they are ready to be added to the dough.
This is particularly useful when following a sourdough baking schedule because the garlic does not have to be prepared at the same moment as every other component.
The Role of Fresh Rosemary
Fresh rosemary gives this sourdough loaf its distinctive herbal character. The recipe calls for one to two sprigs of fresh rosemary, with the leaves carefully removed from the stems and finely chopped. Adding the herb during the stretch-and-fold stage helps distribute it through the dough while also allowing the dough to develop strength.
The rosemary complements the roasted garlic particularly well because the two flavors have different qualities. Roasted garlic contributes a soft, savory sweetness, while rosemary brings a fresh and fragrant herbal note. Together, they create a balanced artisan bread that can be served alongside many meals or enjoyed on its own. If fresh rosemary is unavailable, the source notes that one to two teaspoons of dried rosemary can be used instead.
Understanding the Sourdough Levain
This roasted garlic rosemary sourdough begins with a levain made from ripe sourdough starter, bread flour, and water. The mixture is left covered loosely for approximately three to four hours at around 78°F until it becomes doubled, bubbly, and peaked. This preparation gives the dough an active fermented base before the main flour and water are introduced.
A useful feature of the recipe is that an already active sourdough starter can be used in place of the separately prepared levain. The source specifies that a ripe, bubbly starter fed with equal weights of flour and water can replace the levain, using 100 grams of active starter. This option can simplify the preparation for bakers who already maintain a healthy sourdough starter at home.
Building the Dough with Fermentolyse
Once the levain is ready, the main dough begins with a fermentolyse. The process combines the levain with most of the water, bread flour, and whole wheat flour, followed by a 30-minute resting period. The recipe uses 450 grams of bread flour and 50 grams of whole wheat flour, creating the foundation for a rustic sourdough loaf with a flavorful wheat character.
After the initial rest, salt and the reserved water are incorporated. The dough is worked by hand through squeezing, pinching, folding, and reincorporating the ingredients. Because sourdough dough can feel sticky at this stage, wetting your hands as needed can make handling easier. The dough is then transferred to a covered container or bowl so fermentation and gluten development can continue.
Why Stretch and Folds Matter
Stretching and folding is an important part of developing strength in this artisan sourdough dough. Instead of traditional kneading, the dough is gently stretched upward and folded over itself at intervals. The process is repeated around the dough, with approximately 30 minutes between each session. As the dough develops, it changes from a shaggy mixture into a smoother and more elastic dough.
The roasted garlic and rosemary are incorporated during the later stretch-and-fold stages. During the second stretch and fold, the roasted garlic is placed over the dough and the chopped rosemary is sprinkled across it before the ingredients are folded into the dough. Another stretch and fold follows about 30 minutes later to distribute the flavorful additions more thoroughly. A fourth fold is optional if the dough still needs additional strengthening.
Knowing When the Dough Has Finished Bulk Fermentation
After the stretch-and-fold process, the dough needs additional time to rise. Rather than waiting for the dough to completely double, this recipe uses several visual and physical signs to determine when it is ready for shaping. The dough should look noticeably puffed, jiggle when the container is moved, and show scattered bubbles along the surface and sides. The source indicates that the dough generally rises by about 30 to 40 percent during this stage.
Temperature is an important part of the suggested baking schedule. The schedule is based on keeping the dough around 78°F, which provides a consistent reference point for fermentation. If the dough is not showing the expected signs of fermentation, it should be allowed to continue rising and checked again after approximately 30 minutes rather than being shaped too early.
Pre-Shaping and Bench Rest
When bulk fermentation is complete, the dough is gently turned onto a clean counter. The goal during pre-shaping is to create surface tension without unnecessarily removing the gas that has developed during fermentation. A bench knife and wet hands can help with handling the dough, particularly when it feels sticky. The dough is gradually tucked underneath itself until it forms a loose round.
The dough then rests uncovered for about 30 minutes. During this bench-rest period, the dough may flatten noticeably, but this is part of the process rather than a problem. The resting period allows the gluten to relax before the final shaping stage, making the dough easier to handle and shape into a cohesive loaf.
Shaping the Rosemary Garlic Sourdough
Final shaping gives the loaf structure and helps create the tension needed for good oven expansion. A bowl or banneton lined with a kitchen towel or hair net is prepared and floured as needed. The dough is carefully lifted and shaped by pulling it sideways toward you before folding it toward the top. This movement is repeated around the dough while gradually increasing the tension.
Because roasted garlic is incorporated throughout the dough, a few pieces may appear on the outside during shaping. Any exposed garlic should be removed from the surface and placed underneath the loaf. This helps prevent the garlic from burning during the high-temperature bake while keeping the flavorful roasted garlic inside the finished bread.
Cold Fermentation for Better Sourdough Flavor
After shaping, the dough can be covered and refrigerated overnight for a cold fermentation lasting approximately 12 to 20 hours. This creates a convenient baking schedule because the dough can be prepared in advance and baked the following day. The source also provides a same-day option: instead of refrigerating the shaped dough, allow it to rise for approximately three to four hours until it becomes visibly puffed and risen.
A sample sourdough baking schedule is especially useful because naturally fermented bread takes considerably longer to rise than bread made with commercial yeast. The suggested schedule assumes the dough remains around 78°F throughout the fermentation process. Bakers who prefer to complete the loaf on one day can skip the cold fermentation and allow the shaped dough to rise before baking.
Baking in a Dutch Oven
A Dutch oven is used to bake this sourdough at a high temperature, helping create the characteristic crust associated with artisan bread. The oven and Dutch oven are preheated to 500°F for about 30 minutes. Once the dough is removed from the refrigerator, it is transferred onto parchment paper, which makes moving the shaped loaf into the hot Dutch oven much easier.
Before baking, the chilled dough is scored with a very sharp knife or bread lame. The score is made approximately one inch deep at a shallow angle, allowing the loaf to expand in a controlled way during baking. Scoring the dough directly from the refrigerator is recommended in the source because the cold dough is easier to handle and score cleanly.
Getting a Deep, Crackly Crust
The loaf begins baking covered in the preheated Dutch oven. The oven temperature is then reduced from 500°F to 450°F, and the bread remains covered for 25 minutes. After that, the lid is removed and the loaf continues baking for another 20 minutes until the crust develops a deep brown color and a crackly appearance.
The high-heat Dutch oven method is an important part of the recipe because it provides the environment needed for the artisan-style crust described in the source. Once baking is finished, the bread should be removed from the Dutch oven and allowed to cool. Cutting into the loaf too soon can interfere with the final texture, so giving the bread time to cool is an important finishing step.
Notes for Making This Sourdough Bread Successfully
This recipe can be adapted slightly depending on the ingredients available and the baker’s preferred workflow. The source notes that all bread flour can replace the whole wheat flour, although doing so may require a little additional bulk-fermentation time. This gives bakers some flexibility while maintaining the overall structure of the recipe.
For the levain, an active 100%-hydration sourdough starter can replace the separately prepared levain when it is ripe, bubbly, and active. For the herb component, dried rosemary can replace fresh rosemary when necessary. The specified substitution is one to two teaspoons of dried rosemary for the fresh rosemary used in the recipe.
How to Plan the Baking Schedule
The long fermentation time is one of the main characteristics of this roasted garlic rosemary sourdough bread. The listed preparation, cooking, fermentation, and total times reflect a process that extends across more than one day. Planning ahead makes the recipe much easier because the levain, roasted garlic, dough fermentation, shaping, cold proofing, and final bake each have their own timing requirements.
For a convenient overnight method, the roasted garlic can be prepared in advance, the levain can be mixed and allowed to mature, and the shaped dough can then spend the night in the refrigerator. The following day, the chilled loaf can be scored and transferred directly into the preheated Dutch oven. This approach fits naturally into a planned sourdough baking routine while preserving the recipe’s garlic and rosemary flavor.
Why This Bread Is Worth Making
Roasted garlic rosemary sourdough combines several elements that make homemade artisan bread especially satisfying: naturally fermented dough, a deeply browned crust, tender roasted garlic, and fragrant rosemary. The flavors are strong enough to make the bread memorable but balanced enough to work as an everyday loaf. The source describes the combination as exceptionally flavorful, with the roasted garlic taking a mellow position while the rosemary remains noticeably fragrant.
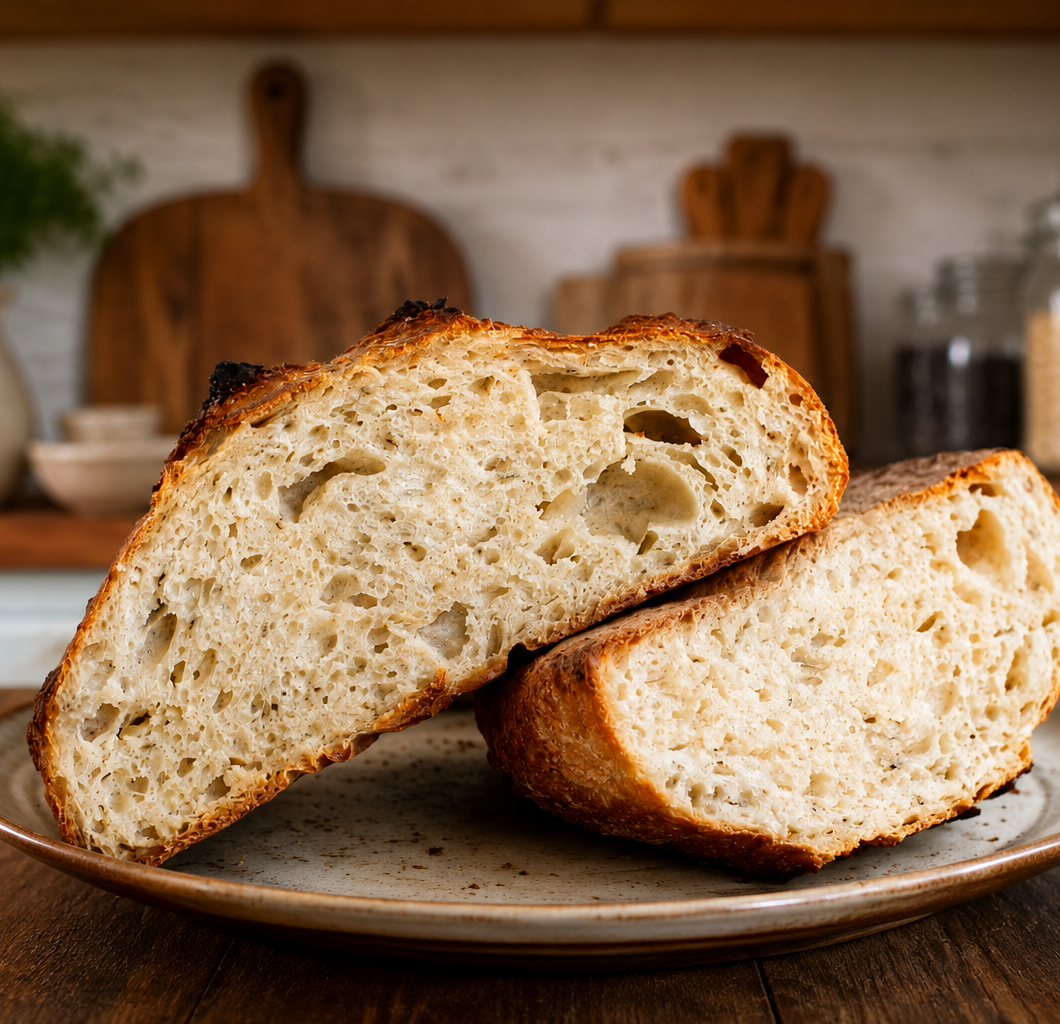
Roasted Garlic Rosemary Sourdough
 Recipe by admin1
A rustic artisan sourdough bread packed with mellow roasted garlic and fragrant fresh rosemary. The naturally fermented dough develops a flavorful interior and a deep, crackly brown crust after baking in a preheated Dutch oven. This savory homemade sourdough is ideal for serving alongside soups, salads, pasta, roasted meats, or simply enjoying warm with your favorite spread.
16
servings1
hour45
minutes118
kcal25
hours26
hours45
minutesIngredients
- Levain
35 grams ripe sourdough starter
35 grams bread flour
35 grams water
- Roasted Garlic
3 bulbs garlic
Olive oil, for drizzling
Salt, for sprinkling
- Rosemary Garlic Sourdough Bread
100 grams ripe, bubbly, peaked levain
450 grams bread flou
50 grams whole wheat flour
375 grams water, divided, with 25 grams reserved for after the fermentolyse
10 grams salt, reserved for after the fermentolyse
All of the roasted garlic, cooled to room temperature
1–2 sprigs fresh rosemary, chopped
Directions
- Combine the ripe sourdough starter, bread flour, and water in a suitable container. Cover loosely and leave the mixture for approximately 3–4 hours at 78°F. The levain is ready when it has doubled, looks bubbly, and reaches its peak. An active sourdough starter fed with equal weights of flour and water can also be used as a substitute.
- While the levain develops, prepare the garlic. Preheat the oven to 400°F. Remove excess outer skin from the three garlic bulbs and slice approximately ½ inch from the tops so the cloves are exposed. Place the bulbs on aluminum foil, drizzle with olive oil, and add a small sprinkle of salt. Wrap the garlic completely in the foil and place it in a baking dish. Roast for 30–40 minutes, until the cloves are very soft and caramelized.
- Remove the roasted garlic from the oven and allow it to cool completely. Squeeze the softened cloves from the bottom of each bulb into a container, then mash them with a fork. Set the roasted garlic aside until it is needed for the dough. The garlic can also be prepared one or two days ahead and refrigerated until ready to use.
- When the levain is bubbly, doubled, and ready, combine 100 grams of levain, 350 grams of water, 450 grams of bread flour, and 50 grams of whole wheat flour. Mix these ingredients together and allow the mixture to rest for 30 minutes. The dough temperature can be managed by adjusting the water temperature according to the temperature of the other ingredients.
- After the 30-minute rest, add the 10 grams of salt and the remaining 25 grams of water. Work the mixture by squeezing the dough between your fingers, pinching pieces together, and folding the dough over itself. Continue until the salt and additional water are fully incorporated. Transfer the dough to a plastic container or glass bowl and cover it.
- During the next two hours, perform a series of stretch-and-fold sessions to strengthen the dough. Wet your hand to prevent sticking, reach underneath the dough, stretch it upward, and fold it over itself. Rotate the bowl and repeat the movement around the dough. Allow approximately 30 minutes between each stretch and fold.
- Remove the rosemary leaves from their stems and finely chop them. During the second stretch-and-fold session, place the roasted garlic over the dough and sprinkle the chopped rosemary across the surface. Fold the dough to incorporate the ingredients. During the following stretch and fold, continue incorporating the garlic and rosemary so they become distributed throughout the dough.
- After the stretch-and-fold stages, cover the dough and let it continue rising for approximately 1½–2 hours. Look for a puffed appearance, visible bubbles, and a gentle jiggle when the bowl is moved. The dough does not need to double in size; an increase of approximately 30–40% is an indication that it may be ready for shaping.
- Gently turn the fermented dough onto a clean counter. Use wet hands and a bench knife if necessary. Work around the dough, tucking it underneath itself to create a round shape and introduce surface tension. Handle it gently so that as much of the fermentation-developed structure as possible is retained. If roasted garlic appears on the outside, move it underneath the dough.
- Leave the pre-shaped dough uncovered for approximately 30 minutes at room temperature. It may flatten during this period, which allows the gluten to relax and prepares the dough for its final shaping.
- Prepare a bowl or banneton with a kitchen towel or hair net and flour it as needed. Lightly flour the dough, then use a bench knife to lift it and place it floured-side down. Pull the dough sideways toward yourself and fold it toward the top. Continue around the dough, repeating the movement while gradually creating more tension. Place the shaped loaf into the prepared bowl. Remove any roasted garlic pieces that remain exposed on the surface to help prevent burning during baking.
- Cover the shaped dough with a tea towel, shower cap, or plastic wrap and refrigerate it overnight for approximately 12–20 hours. For a same-day bake, allow the shaped dough to rise for approximately 3–4 hours until it looks puffed and risen before proceeding to baking.
- Place the Dutch oven, including its lid, inside the oven. Preheat to 500°F for 30 minutes. Because the cookware becomes extremely hot, use appropriate heat protection when handling it. Remove the dough from the refrigerator while the Dutch oven is fully preheated.
- Place parchment paper over the chilled dough and carefully flip it so the dough rests on the parchment. Remove the bowl or banneton and kitchen towel. Score the top using a very sharp knife or bread lame, making a shallow cut approximately 1 inch deep. Scoring the dough while it is still cold helps make this step easier.
- Carefully remove the preheated Dutch oven from the oven. Transfer the dough, along with the parchment paper, into the Dutch oven. Cover with the lid and return it to the oven. Reduce the temperature to 450°F and bake covered for 25 minutes. Remove the lid and continue baking for approximately 20 minutes, or until the loaf develops a deep brown, crackly crust. Remove the bread from the Dutch oven and allow it to cool before serving.
Notes
- The whole wheat flour can be replaced with bread flour if preferred. According to the source recipe, using all bread flour may require a little additional time during bulk fermentation.
- A ripe, bubbly, active sourdough starter with 100% hydration can replace the prepared levain. The specified substitution is 100 grams of bubbly sourdough starter for 100 grams of levain.
- Fresh rosemary provides the intended flavor, but dried rosemary can be substituted when necessary. Use 1–2 teaspoons of dried rosemary in place of the fresh rosemary.
- The suggested baking schedule assumes the dough remains around 78°F throughout the fermentation process. Fermentation timing can therefore vary if the dough temperature is significantly different.
Nutrition Facts
- Calories: 118kcal
- Fat: 1g
- Carbohydrates: 24g
- Fiber: 1g
- Sugar: 0.1g
- Protein: 4g

