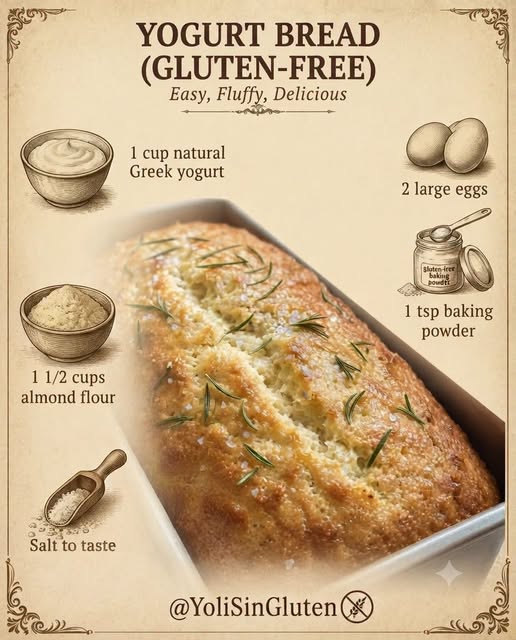
Gluten-Free Bread with Yogurt That Turns Out Soft and Flavorful Every Time
Finding a gluten-free bread recipe that has a soft crumb, a pleasant texture, and a crust with just the right amount of crispness can be challenging. After making many different versions at home, this yogurt-based gluten-free bread has become one of my favorite recipes because it delivers consistent results without requiring complicated techniques. The combination of yogurt and apple cider vinegar gives the loaf a mild tang that reminds me of traditional artisan bread, while instant yeast keeps the preparation simple and much quicker than making sourdough.
Unlike many gluten-free loaves that become dry or crumbly after cooling, this bread stays tender and slices beautifully. It works well for sandwiches, toast, breakfast, or simply served warm with butter or your favorite spread. Since the dough only needs one rise, most of the preparation time is hands-off, making it an easy choice for both beginners and experienced home bakers.
Why I Enjoy Making This Bread
Whenever I want fresh homemade bread without spending an entire day in the kitchen, this recipe is my first choice. The dough comes together quickly, and once it starts rising, there is very little left to do besides waiting for the oven to finish its work.
The yogurt plays an important role in creating a soft interior while also adding a subtle tangy flavor. Combined with apple cider vinegar, it creates a loaf that tastes more complex than ordinary yeast bread without requiring a sourdough starter.
Another reason I like this recipe is that it uses only a handful of ingredients. There is no long ingredient list filled with specialty additives, yet the finished loaf has a pleasant texture and a satisfying crust.
What Makes This Bread Different
Many gluten-free breads rely heavily on gums or starches to create structure. This recipe instead uses psyllium husk, which absorbs water and forms a gel before the dough is mixed. That gel helps hold everything together and makes the dough much easier to shape.
Once baked, the loaf has:
- A soft interior
- A light chewy texture
- A crisp golden crust
- Mild tangy flavor
- Good slicing ability
- Excellent texture for toast
Instead of becoming dry after one day, the bread stays enjoyable for several days when stored properly.
Ingredients That Make This Recipe Work
- Although the ingredient list is short, every ingredient contributes something important to the finished loaf.
Psyllium Husk
- Psyllium husk is one ingredient I never skip when making gluten-free bread. After being mixed with hot water, it transforms into a thick gel that replaces much of the elasticity usually provided by gluten.
- This gel helps the dough hold its shape while rising and baking. It also improves the texture of the finished bread, making each slice more flexible instead of crumbly.
- Be sure to use whole psyllium husk rather than psyllium husk powder because they absorb liquid differently and may affect the final consistency.
Sweetener
- A small amount of maple syrup or cane sugar helps support the yeast during the dough-making process.
- The bread itself does not taste sweet. Instead, the sweetener simply encourages proper fermentation while also helping develop a nicely browned crust during baking.
Hot Water
- Using hot water helps hydrate the psyllium husk quickly and creates the gel needed for the dough.
- The water should be hot enough to help the ingredients combine well but not boiling.
Unsweetened Yogurt
- Yogurt is one of the key ingredients that gives this bread its soft texture.
- I prefer using unsweetened dairy-free yogurt, but any plain unsweetened yogurt with a smooth consistency works well. A yogurt that is too thick may make the dough feel heavy, while a thinner yogurt creates a softer dough that rises nicely.
- Besides moisture, yogurt contributes a gentle tang that makes the bread taste richer than many basic gluten-free loaves.
Apple Cider Vinegar
- Only a small amount of apple cider vinegar is needed, but it makes a noticeable difference.
- It complements the yogurt by adding a little extra acidity, improving both flavor and dough development. The finished bread has a pleasant, slightly tangy taste without being overpowering.
Gluten-Free Bread Flour Blend
- A good gluten-free bread flour blend forms the base of this recipe.
- The blend should contain a balanced combination of gluten-free whole-grain flours and starches. This combination helps create a loaf that is light enough to rise well while still remaining sturdy after baking.
- Since different flour blends absorb moisture differently, the dough consistency may vary slightly from kitchen to kitchen.
Sea Salt
- Salt brings out the flavor of every ingredient while also balancing the slight sweetness from the maple syrup or cane sugar.
- Without enough salt, homemade bread often tastes flat even when baked perfectly.
Instant Yeast
- Instant yeast makes this recipe especially convenient because it can be mixed directly with the dry ingredients.
- There is no need for a separate proofing step before mixing the dough, which saves time and reduces preparation.
- As long as the yeast is fresh, the dough should rise beautifully within about one hour.
Why Weight Measurements Matter
- Whenever I bake bread, I rely on a kitchen scale instead of measuring cups.
- Flour can easily become packed into measuring cups, leading to inconsistent amounts. Even a small difference in flour weight can affect hydration and texture.
- Using grams helps produce repeatable results every time the recipe is made.
- This is especially important for gluten-free baking, where maintaining the correct balance between flour and liquid has a major effect on the finished loaf.
Preparing the Psyllium Gel
- The first step is making the psyllium gel.
- I combine the psyllium husk, sweetener, hot water, yogurt, and apple cider vinegar in a bowl, then whisk everything together until fully mixed.
- After only a few minutes, the mixture thickens noticeably.
- Instead of looking like a liquid, it becomes smooth and gel-like. This is exactly what I want before adding it to the dry ingredients.
- Giving the mixture enough time to fully hydrate makes the dough much easier to work with later.
Mixing the Dough
- While the psyllium mixture thickens, I combine the gluten-free flour blend, sea salt, and instant yeast in a separate bowl.
- Whisking these ingredients together helps distribute the yeast evenly throughout the flour.
- Once both mixtures are ready, I slowly combine them until a soft dough forms.
- If I’m using a stand mixer fitted with a dough hook, I allow it to mix until everything comes together smoothly.
- When mixing by hand, I use a sturdy whisk at first before finishing with my hands to ensure no dry flour remains.
- The dough should feel soft, slightly sticky, and airy rather than stiff or dense.
- If it appears too dry because of differences in yogurt consistency or flour absorption, adding a small amount of extra water helps achieve the right texture.
Shaping the Dough
- Once the dough is fully mixed, I transfer it to a lightly floured work surface and gently shape it with my hands. Unlike traditional wheat dough, gluten-free dough does not require extensive kneading. Instead, I focus on bringing everything together into a smooth, even loaf without pressing out too much air.
- Depending on how I plan to bake it, I either shape the dough into a round loaf for a banneton basket or place it directly into a loaf pan. If I’m using a banneton, I position the seam side up so it can be turned over before baking. For a loaf pan, I place the seam side down to create a smooth top.
- The dough should feel soft and slightly springy. If it sticks a little to my hands, I simply dampen them with water rather than adding extra flour, which can make the loaf heavier.
Allowing the Dough to Rise
- After shaping, I cover the dough with a clean kitchen towel and leave it in a warm place to rise.
- This recipe only requires one rise, making it much simpler than many homemade bread recipes. During this time, the yeast works to create air pockets that give the bread its light texture.
- After about an hour, the dough becomes noticeably larger and feels airy when gently touched. Instead of looking dense, it develops a soft, puffy appearance that signals it is ready for baking.
- While the dough rises, I preheat the oven to 425°F (220°C). If using a Dutch oven, I place it inside during preheating so it becomes thoroughly hot before the bread goes in. This helps create a beautiful crust.
Scoring Before Baking
- Before placing the loaf into the oven, I score the top with a sharp knife or bread lame.
- This simple step allows steam to escape in a controlled way while baking. Without scoring, the bread may crack unevenly along the sides.
- A single deep slash down the center works perfectly, although decorative patterns can also be used if desired. Besides improving appearance, scoring encourages the loaf to expand evenly as it bakes.
Baking the Bread
- Once the dough is scored, it is ready for the oven.
- If baking in a Dutch oven, I carefully transfer the loaf onto parchment paper or a silicone bread sling before lowering it into the hot pot.
- If using a loaf pan, I place it directly into the oven.
- The bread bakes for 1 hour and 20 minutes. When using a Dutch oven, I remove the lid during the final 15 to 20 minutes so the crust develops a rich golden-brown color.
- As the bread bakes, the kitchen fills with the comforting aroma of freshly baked bread. The crust gradually becomes crisp while the inside finishes cooking into a soft, tender crumb.
- When done, the loaf should have a deep golden exterior and sound slightly hollow when tapped on the bottom.
Cooling the Bread Properly
- One of the most important steps happens after the bread comes out of the oven.
- Instead of slicing immediately, I remove the loaf from the pan and place it directly on the oven rack. With the oven switched off and the door slightly open, I let the bread remain inside for another 30 to 60 minutes.
- This extra drying time helps remove excess moisture from the center of the loaf, reducing the chance of a gummy texture.
- Afterward, I transfer the bread to a cooling rack and allow it to cool completely.
- Waiting several hours—or even overnight—may require patience, but it makes a noticeable difference. The crumb continues to set as it cools, producing slices that are neat, firm, and easy to cut.
Serving Suggestions
- Once fully cooled, the bread slices beautifully.
- Its mild tangy flavor pairs well with both sweet and savory toppings, making it suitable for almost any meal.
- Some favorite ways to enjoy it include:
- Toasted with butter or dairy-free spread
- Served with fruit jam or honey
- Filled with sandwich ingredients
- Topped with mashed avocado
- Served alongside soup or salad
- Used for grilled sandwiches
- Toasted for breakfast with nut butter
Because the bread has a balanced flavor, it complements many different fillings without overpowering them.
Storage Tips
- Homemade gluten-free bread stays freshest when stored correctly.
At Room Temperature
- Once completely cooled, I keep the loaf in a sealed container or bread bag for up to three days. During this time, the bread remains soft and pleasant to eat.
- If it begins to dry slightly, a quick toast easily refreshes it.
In the Refrigerator
- For longer storage, I place the loaf in an airtight bag and refrigerate it for up to one week.
- Although refrigeration can firm the bread slightly, warming or toasting each slice restores much of its original texture.
In the Freezer
- Freezing is my preferred method because it keeps the bread tasting fresh for months.
- Before freezing, I slice the entire loaf and place parchment paper between each slice. This allows me to remove only the number of slices I need without thawing the whole loaf.
- The bread stores well in the freezer for up to six months.
Reheating
- Frozen slices can be reheated directly without thawing.
- I usually microwave each slice for 30 to 60 seconds, or warm it in a 350°F (175°C) oven for about 5 minutes until heated through.
- For a crisp finish, I often toast the slices after reheating.
Helpful Tips for Success
A few simple practices make this recipe more reliable every time I prepare it.
- Measure ingredients by weight for better accuracy.
- Use whole psyllium husk rather than psyllium powder.
- Choose plain, unsweetened yogurt with a smooth consistency.
- Allow the psyllium mixture enough time to become fully gelled.
- Avoid adding too much extra flour while shaping.
- Let the dough complete its full rise before baking.
- Cool the bread completely before slicing.
- Freeze leftover slices to maintain freshness.
Description
This gluten-free bread with yogurt is soft, light, and full of flavor with a gentle tang that resembles artisan-style bread. The yogurt keeps the crumb moist and tender, while psyllium husk provides the structure needed for a well-shaped loaf. With only one rise and the convenience of instant yeast, this recipe is simple enough for everyday baking and produces bread that’s perfect for sandwiches, toast, or serving alongside your favorite meals.
Recipe Details
- Prep Time: 20 minutes
- Rise Time: 1 hour
- Bake Time: 1 hour 20 minutes
- Cooling Time: 4–5 hours (or overnight for best results)
- Total Time: About 7 hours (including cooling)
- Yield: 1 loaf
Ingredients
- 20 g maple syrup or cane sugar
- 320 g hot water
- 18 g whole psyllium husk
- 200 g unsweetened yogurt (dairy-free cashew yogurt or another plain unsweetened yogurt)
- 5 g (1 teaspoon) apple cider vinegar
- 460 g gluten-free bread flour blend
- 12 g sea salt
- 7 g gluten-free instant yeast
Equipment
- Large mixing bowl
- Stand mixer with dough hook (optional)
- Dough whisk or sturdy spoon
- Kitchen scale
- Banneton basket or loaf pan
- Parchment paper or silicone bread sling
- Dutch oven (optional)
- Sharp knife or bread lame
- Cooling rack
Instructions
Prepare the Psyllium Mixture
In a medium bowl, combine the whole psyllium husk, maple syrup or cane sugar, hot water, yogurt, and apple cider vinegar. Whisk well until everything is evenly mixed. Let the mixture sit for several minutes until it becomes thick and forms a gel.
Mix the Dry Ingredients
In a large mixing bowl, whisk together the gluten-free bread flour blend, sea salt, and instant yeast until evenly combined.
Make the Dough
Pour the psyllium gel into the dry ingredients.
Mix using a stand mixer fitted with a dough hook or stir by hand until a smooth dough forms. Scrape down the bowl if necessary to ensure all ingredients are fully incorporated.
If the dough feels overly dry due to differences in flour or yogurt consistency, add up to 30 g of additional water until the dough becomes soft and workable.
Shape the Dough
Transfer the dough onto a clean work surface and gently shape it into your preferred loaf.
- Place the dough seam-side up in a banneton basket if baking in a Dutch oven.
- Place the dough seam-side down in a loaf pan if baking directly in the pan.
Let the Dough Rise
Cover the dough with a clean kitchen towel and leave it in a warm place for about 1 hour, or until it has nearly doubled in size and feels light and airy.
While the dough is rising, preheat the oven to 425°F (220°C). If using a Dutch oven, place it in the oven during preheating.
Score the Loaf
Carefully transfer the risen loaf onto parchment paper or a silicone bread sling if using a Dutch oven.
Using a sharp knife or bread lame, score the top of the loaf with one or more shallow cuts.
If baking in a loaf pan, lightly brush the surface with oil if you prefer a softer, more golden crust.
Bake
Bake the bread for 1 hour and 20 minutes.
If using a Dutch oven, remove the lid during the last 15–20 minutes to allow the crust to brown.
The finished loaf should have a deep golden crust and sound hollow when tapped on the bottom.
Dry the Interior
Remove the loaf from the baking vessel and place it directly on the oven rack.
Turn off the oven and leave the door slightly open. Allow the bread to remain inside for 30–60 minutes to help remove excess moisture from the center.
Cool Completely
Transfer the loaf to a cooling rack and allow it to cool completely before slicing.
For the best texture, let the bread cool for at least 4–5 hours, or overnight if possible.
Slice and Serve
Once fully cooled, slice the bread with a sharp serrated knife.
Serve fresh, toasted, or use it for sandwiches, breakfast toast, or your favorite spreads.
Notes
- Whole psyllium husk is essential for this recipe and should not be substituted with psyllium husk powder.
- A thinner plain yogurt works better than very thick yogurt, helping create a lighter dough.
- Measuring ingredients with a kitchen scale provides the most accurate and consistent results.
- If the dough appears dry after mixing, add a small amount of extra water until it reaches a soft consistency.
- Cooling the bread completely before slicing helps prevent a gummy interior.
- If using active dry yeast instead of instant yeast, dissolve the yeast with the sweetener and 100 g of the warm water (taken from the total water amount). Let it stand for 10–15 minutes until foamy before adding it to the psyllium mixture.
Storage
- Room Temperature: Store in a sealed bag or airtight container for up to 3 days.
- Refrigerator: Keep in an airtight bag for up to 1 week.
- Freezer: Slice the loaf before freezing and place parchment paper between slices. Store for up to 6 months.
Reheating
- Microwave frozen slices for 30–60 seconds, or
- Warm in a 350°F (175°C) oven for about 5 minutes, or
- Toast directly until heated through and lightly crisp.
This bread is delicious fresh, toasted, or used in sandwiches, making it a versatile gluten-free loaf for everyday meals.
Nutrition
Iron: 2 mg
Calories: 232 kcal
Carbohydrates: 20 g
Protein: 12 g
Fat: 13 g
Saturated Fat: 2 g
Polyunsaturated Fat: 3 g
Monounsaturated Fat: 3 g
Trans Fat: 0.01 g
Cholesterol: 42 mg
Sodium: 281 mg
Potassium: 220 mg
Fiber: 5 g
Sugar: 2 g
Vitamin A: 61 IU
Vitamin C: 0.1 mg
Calcium: 168 mg
Disclaimer: Nutrition values are estimates and may vary depending on the gluten-free flour blend, yogurt, and other specific ingredients used.
