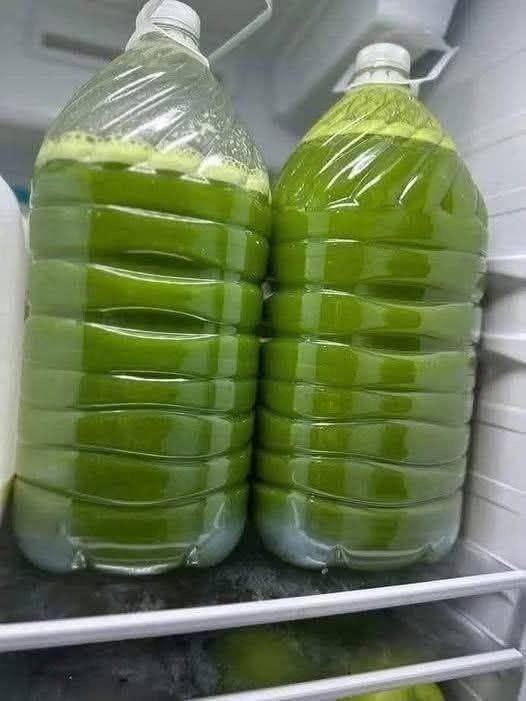
Green Fresh Juice Recipe (Detailed Version)
Introduction
Green fresh juice is a refreshing, nutrient-rich beverage made by extracting juice from a variety of fresh green vegetables, herbs, fruits, and natural flavor enhancers. It is popular because it provides vitamins, minerals, antioxidants, and hydration in a convenient drink. While green juice is not a replacement for eating whole vegetables and fruits, it can be a delicious addition to a balanced diet.
The recipe below is a comprehensive version that includes ingredient explanations, preparation techniques, juicing tips, serving suggestions, storage methods, optional variations, and common mistakes to avoid.
Preparation Time
Preparation Time: 30 minutes
Juicing Time: 15 minutes
Total Time: 45 minutes
Servings: 4 large glasses
Difficulty Level: Easy
Main Ingredients
6 large fresh cucumbers
8 celery stalks
6 cups fresh spinach leaves
4 cups kale leaves with thick stems removed
2 cups parsley leaves
1 cup fresh cilantro
2 green apples
2 ripe pears
1 lemon, peeled
1 lime, peeled
2-inch piece fresh ginger
1-inch piece fresh turmeric (optional)
2 green kiwis, peeled
1 large zucchini
1 cup romaine lettuce
1 cup mint leaves
1 cup basil leaves
2 cups wheatgrass (optional)
1 green bell pepper
1 small fennel bulb
1 cup broccoli stems
2 cups cabbage leaves
1 cup Swiss chard
1 teaspoon spirulina powder (optional)
1 teaspoon chlorella powder (optional)
1 tablespoon fresh aloe vera gel (food-grade, optional)
1 tablespoon chia seeds (optional after juicing)
1 tablespoon flaxseed oil (optional)
1 teaspoon raw honey or maple syrup (optional)
2 cups cold filtered water if needed
Ice cubes for serving
Optional Flavor Enhancers
Fresh rosemary
Fresh thyme
Fresh dill
Fresh oregano
Fresh sage
Fresh tarragon
A pinch of sea salt
A pinch of black pepper
A pinch of cinnamon
A pinch of cardamom
Fresh coconut water instead of plain water
Fresh cucumber slices
Fresh lemon slices
Fresh lime slices
Fresh mint sprigs
Equipment Needed
Juicer
Blender (if no juicer is available)
Fine mesh strainer
Large mixing bowl
Sharp knife
Cutting board
Vegetable brush
Measuring cups
Large spoon
Serving glasses
Storage bottles with airtight lids
Step 1: Choosing Fresh Ingredients
Select vegetables that are bright green and free from yellow spots.
Choose cucumbers that are firm and smooth.
Pick celery with crisp stalks.
Spinach should have vibrant leaves without wilting.
Kale leaves should be dark green and fresh.
Apples should be firm and juicy.
Lemons and limes should feel heavy for their size because they contain more juice.
Fresh herbs should have a strong natural aroma.
Avoid vegetables that are bruised, moldy, or overly soft.
Step 2: Washing Ingredients
Wash every vegetable under cold running water.
Use a vegetable brush to clean cucumbers, zucchini, ginger, turmeric, and apples.
Separate leafy greens and rinse each leaf thoroughly.
Wash herbs several times to remove dirt.
Dry all ingredients using a clean kitchen towel or salad spinner.
Step 3: Preparing the Ingredients
Trim celery ends.
Remove thick kale stems.
Cut cucumbers into smaller pieces.
Slice apples and remove seeds.
Cut pears into chunks.
Peel lemons and limes while leaving a little white pith.
Peel kiwis.
Slice ginger.
Slice turmeric.
Cut zucchini into pieces.
Chop broccoli stems.
Slice fennel.
Roughly chop herbs.
Step 4: Juicing Order
For maximum juice extraction, process ingredients in this order:
Cucumber
Celery
Zucchini
Green apple
Pear
Fennel
Broccoli stems
Green bell pepper
Spinach
Swiss chard
Kale
Romaine lettuce
Cabbage
Parsley
Cilantro
Mint
Basil
Wheatgrass
Ginger
Turmeric
Lemon
Lime
Kiwi
Alternate soft leafy greens with firm vegetables to improve juice flow through the machine.
Step 5: Mixing the Juice
Pour all extracted juice into a large bowl.
Stir gently.
Taste the juice.
If it is too strong, add cold filtered water or coconut water.
If it is too tart, add another apple or a teaspoon of honey.
If desired, mix in spirulina powder.
Add chlorella powder if using.
Stir until fully dissolved.
Add aloe vera gel and mix thoroughly.
Add flaxseed oil if desired.
Step 6: Straining
If smoother juice is preferred, pour through a fine mesh strainer.
Press gently with a spoon.
Discard or save the pulp.
The pulp can be used in soups, vegetable patties, muffins, bread, pasta sauce, smoothies, crackers, or compost.
Step 7: Serving
Fill glasses with ice cubes.
Pour juice over the ice.
Garnish with cucumber slices.
Add lemon slices.
Decorate with mint leaves.
Serve immediately while cold.
Taste Profile
Fresh
Crisp
Naturally sweet
Slightly tangy
Refreshing
Lightly herbal
Smooth
Cooling
Bright
Balanced
Nutritional Benefits
Rich in vitamin A
Rich in vitamin C
Rich in vitamin K
Contains potassium
Contains magnesium
Contains calcium
Contains iron
Contains folate
Contains antioxidants
Contains chlorophyll
Provides hydration
Contains natural enzymes
Contains plant compounds that support overall health
Provides small amounts of natural sugars from fruit
Contains many beneficial phytonutrients
Optional Additions
Green grapes
Honeydew melon
Pineapple
Avocado
Coconut water
Coconut milk
Fresh cucumber juice
Carrot juice
Celery juice
Beet greens
Dandelion greens
Mustard greens
Baby spinach
Arugula
Watercress
Fresh peas
Young pea shoots
Sunflower sprouts
Broccoli sprouts
Microgreens
Seasonal Variations
Spring Version
Use spinach, mint, parsley, cucumber, green apple, lemon, and pea shoots.
Summer Version
Use cucumber, celery, watermelon, mint, basil, lime, and green grapes.
Autumn Version
Use kale, pear, apple, ginger, fennel, parsley, and lemon.
Winter Version
Use cabbage, kale, spinach, celery, lemon, ginger, parsley, and green apple.
Storage Instructions
Fresh juice tastes best immediately after preparation.
Store leftovers in airtight glass bottles.
Fill bottles completely to reduce air exposure.
Refrigerate immediately.
Consume within 24 to 48 hours for the best flavor and nutritional quality.
Shake well before serving because natural separation occurs.
Do not leave juice at room temperature for long periods.
Serving Suggestions
Serve with whole-grain toast.
Pair with vegetable omelets.
Enjoy with oatmeal.
Serve alongside salads.
Drink before breakfast.
Enjoy after light exercise.
Serve during brunch.
Pair with grilled vegetables.
Enjoy as an afternoon refreshment.
Common Mistakes
Using old vegetables.
Skipping proper washing.
Adding too much ginger.
Using too many bitter greens.
Not balancing vegetables with fruit.
Allowing juice to sit uncovered.
Using warm ingredients.
Adding excessive sweeteners.
Not cleaning the juicer immediately after use.
Overfilling the juicer.
Cleaning the Juicer
Disassemble the juicer immediately after use.
Rinse every part with warm water.
Use a soft brush to remove pulp.
Wash with mild dish soap.
Rinse thoroughly.
Allow parts to dry completely before reassembling.
Tips for the Best Green Juice
Use chilled ingredients for a naturally cold drink.
Rotate different leafy greens for variety.
Use organic produce when available.
Taste as you prepare.
Adjust sweetness naturally with apples or pears.
Drink slowly.
Serve immediately.
Experiment with herbs for different flavors.
Keep equipment clean.
Store juice properly.
Prepare ingredients before starting the juicer for a smooth workflow.
Conclusion
This green fresh juice recipe creates a vibrant, refreshing beverage packed with a wide variety of fresh vegetables, herbs, fruits, and optional nutrient-rich additions. The combination of crisp cucumber, celery, leafy greens, fresh herbs, citrus, ginger, and naturally sweet fruits produces a balanced flavor that is refreshing and enjoyable. By using fresh ingredients, careful preparation, proper juicing techniques, and correct storage methods, you can consistently make a delicious homemade green juice suitable for breakfast, a midday refreshment, or as part of a balanced diet.
