Easy Gluten Free Sandwich Bread
Some recipes completely change the way you think about gluten-free baking, and this Easy Gluten Free Sandwich Bread is one of those special recipes. It produces a loaf that is incredibly soft, fluffy, and tender with a pillowy crumb that stays fresh for days, making it perfect for sandwiches, toast, or even simply enjoying with butter. Unlike many gluten-free breads that dry out quickly or become crumbly within hours, this loaf maintains its softness and structure, giving you a true bakery-style result straight from your own kitchen.
At first, gluten-free bread can feel complicated or unpredictable, but this recipe is actually very straightforward once you understand the method behind it. The dough is intentionally soft, sticky, and almost batter-like in texture, which is exactly what creates the light, airy crumb inside the loaf. It may feel unusual at first, especially if you are used to traditional wheat dough, but this softness is essential. Adding extra flour will ruin the texture and make the bread dense, dry, and heavy instead of fluffy and tender.
The process begins with preparing a psyllium gel, which is one of the most important components in gluten-free baking. Psyllium husk absorbs liquid and forms a gel-like structure that mimics gluten, giving the bread elasticity, strength, and the ability to rise properly without collapsing. Once the gel has thickened, milk, oil, and eggs are added to it, creating a rich, smooth wet mixture. After that, the dry ingredients are incorporated, and everything is mixed thoroughly until a uniform, lump-free dough forms. A stand mixer with a dough hook is strongly recommended because the dough is very sticky and difficult to handle by hand.
What makes this bread unique is the way it is shaped. Instead of traditional kneading, the dough is gently handled on a well-floured surface using floured hands. First, it is shaped into a soft, smooth ball, and then carefully formed into a log that fits neatly into a loaf pan. This gentle shaping is important because it preserves the airiness of the dough and ensures the final loaf stays light rather than dense or compact.
Unlike most traditional breads, this loaf is scored before proofing rather than after. This technique is especially important for gluten-free dough because it tends to expand unevenly during rising. Without scoring, the surface can crack randomly or tear in unpredictable ways. Scoring before proofing guides the expansion and allows the bread to rise evenly, resulting in a smooth, professional-looking top crust once baked.
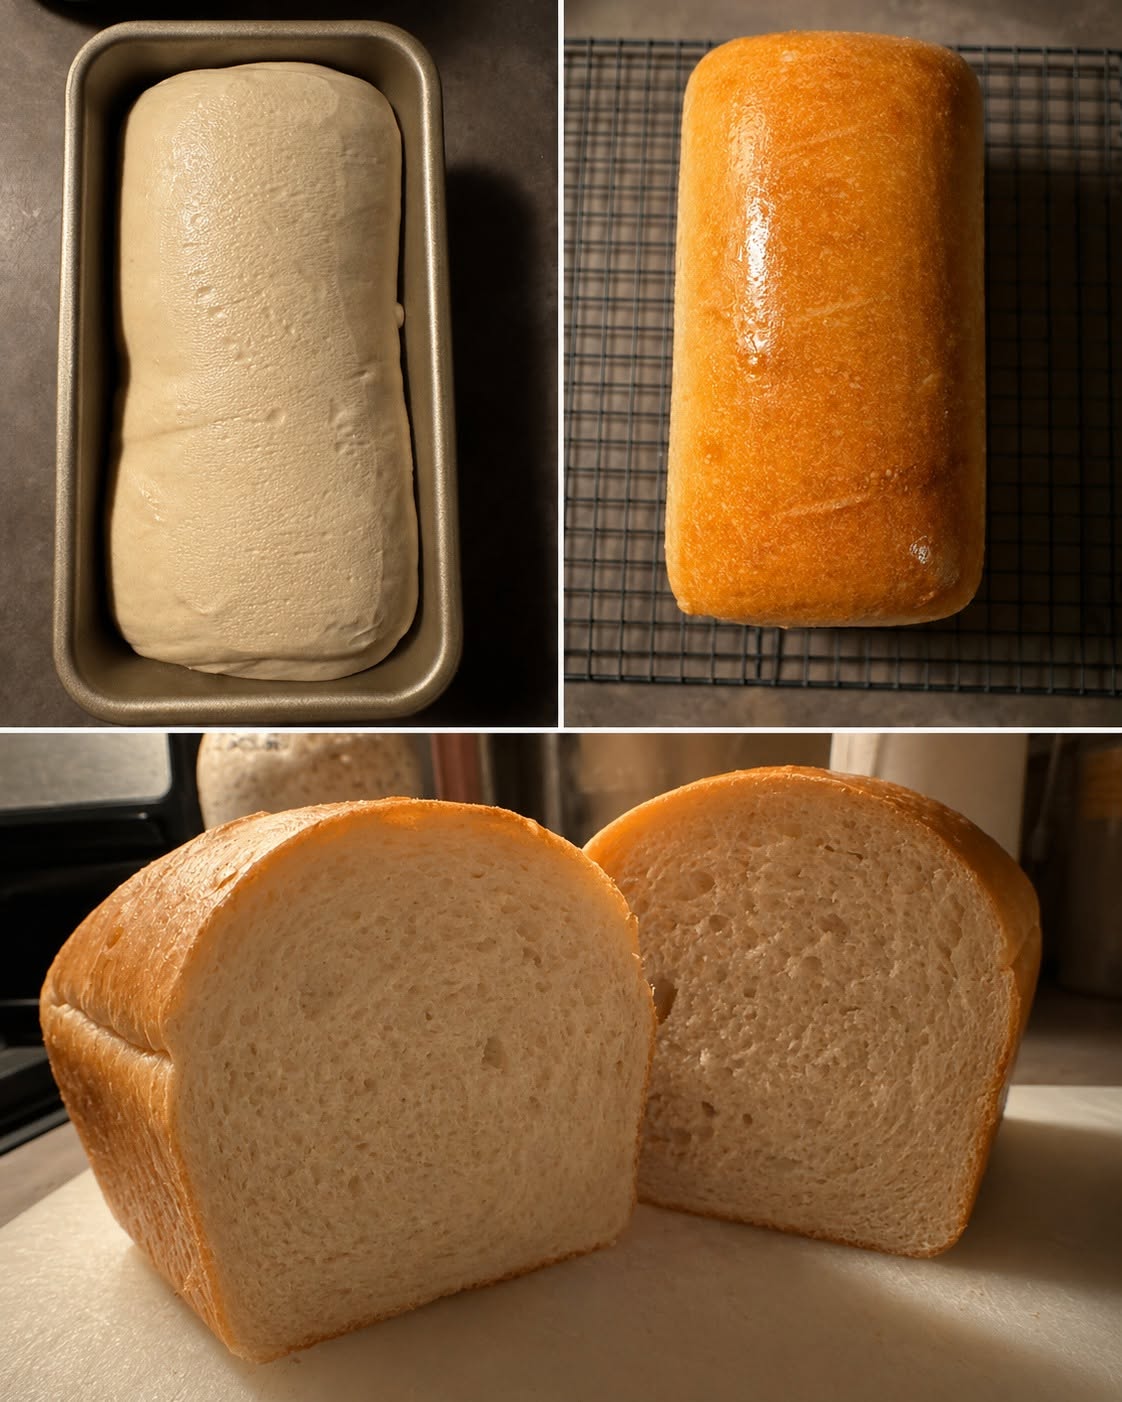
During proofing, the dough rises significantly and often expands above the rim of the loaf pan. This is completely normal and exactly what you want, as it creates the tall, classic sandwich bread shape. The dough should look visibly puffed, airy, and soft before it goes into the oven. Just before baking, the top is lightly brushed with egg white, which helps create a glossy, golden-brown crust and enhances the overall appearance of the finished loaf.
Baking is one of the most important steps in achieving the perfect loaf. The bread is baked at around 200°C (400°F) for approximately 60 to 70 minutes, ideally on the lowest oven rack. For best results, it should be placed on a preheated baking steel or baking stone, which provides strong, even heat from the bottom and prevents a dense or undercooked layer from forming underneath. If the top browns too quickly during baking, it can be loosely covered with foil while the interior continues to bake fully.
A crucial detail in this recipe is making sure the crust becomes firm and well-developed on all sides. When the bread comes out of the oven, the crust should feel crisp and structured on the top, sides, and bottom. This step is very important because the crust supports the soft interior and prevents the loaf from collapsing while it cools. If needed, the bread can be removed from the pan and baked for an additional 5 to 10 minutes to further strengthen and crisp the exterior.
Once fully baked, the loaf should feel light for its size and have a deep golden color with a slightly crisp outer crust. As it cools, the crust softens slightly while still maintaining enough structure to hold the loaf together beautifully. Inside, the crumb is soft, fluffy, and airy, slicing cleanly without crumbling.
The success of this recipe comes from the careful balance of ingredients. Psyllium husk and xanthan gum work together to replicate gluten’s structure and elasticity, allowing the dough to stretch and rise properly. Baking powder adds extra lift, helping the bread become lighter and more tender. Eggs provide richness, flavor, and structure, while oil ensures the crumb stays moist and soft for several days. Every ingredient plays an important role in achieving the final texture.
Another key factor is hydration. The dough is intentionally very soft and high in moisture, which may seem unusual compared to traditional bread doughs. However, this high hydration is what creates the signature fluffy texture and prevents the bread from drying out too quickly. It also contributes to the soft, airy crumb that makes this loaf so enjoyable.
This gluten-free sandwich bread is extremely versatile and can be used in many different ways. It is perfect for sandwiches filled with vegetables, meats, or spreads. It toasts beautifully, developing a crisp exterior while remaining soft inside. It can also be used for grilled cheese, French toast, or simply served warm with butter or jam.
One of the biggest advantages of this bread is how well it stores. Unlike many homemade gluten-free breads that become dry within a day, this loaf stays soft for several days when kept in an airtight container. It can also be sliced and frozen, then toasted directly from frozen, making it ideal for meal prep and daily use.
Overall, this Easy Gluten Free Sandwich Bread is a reliable, bakery-style recipe that consistently delivers soft, fluffy, and satisfying results. It brings together simple techniques and carefully balanced ingredients to create a loaf that feels just like traditional sandwich bread—light, tender, and perfect for everyday enjoyment.
Easy Gluten Free Sandwich Bread Recipe
Ingredients
Dry Ingredients
- 300 g gluten-free flour blend (preferably custom mix, not basic 1:1 blend)
- 1 teaspoon xanthan gum (if not already included in flour blend)
- 2 teaspoons baking powder
- 2 teaspoons instant yeast
- 1 teaspoon salt
- 1–2 tablespoons sugar (optional, helps yeast activity and slight sweetness)
Wet Ingredients
1 egg white (for glossy crust)
Instructions
1. Prepare the psyllium gel
In a small bowl, mix psyllium husk powder with warm milk. Stir immediately and let it sit for 5–10 minutes. It will turn into a thick gel. This step is very important because psyllium creates the structure that replaces gluten and helps the bread hold its shape.
2. Mix wet ingredients
In a large mixing bowl, add the psyllium gel, eggs, oil, and vinegar (if using). Whisk or mix until smooth and fully combined. The mixture should look thick, slightly sticky, and uniform.
3. Combine dry ingredients
In a separate bowl, mix gluten-free flour, xanthan gum, baking powder, yeast, salt, and sugar. Stir well so everything is evenly distributed. This helps avoid clumps and ensures even rising.
4. Make the dough
Add dry ingredients into the wet mixture gradually. Use a stand mixer with a dough hook (recommended) and mix for 5–8 minutes until a smooth, sticky dough forms.
The dough will be soft and sticky—almost like thick batter. Do NOT add extra flour. This texture is necessary for a fluffy result.
5. First shaping
Lightly flour your surface and hands. Transfer the dough onto the surface and gently shape it into a smooth ball. Then carefully form it into a log shape that fits your loaf pan.
Do not overwork or press too hard—gentle handling keeps the bread airy.
Prepare loaf pan & scoring
Place dough into a greased or parchment-lined loaf pan.
Using a sharp knife, lightly score the top of the dough BEFORE proofing. This helps control expansion and prevents random cracks during rising.
Proofing (rising stage)
Cover the loaf pan with a clean towel or plastic wrap.
Let the dough rise in a warm place for 45–75 minutes, or until it doubles and rises above the rim of the pan.
It should look soft, airy, and expanded—not dense.
Baking
- Preheat oven to 200°C (400°F).
- Place loaf on the lowest oven rack for best bottom heat. If possible, place it on a preheated baking steel or heavy baking tray for even baking.
- Bake for 60–70 minutes.
Important baking notes:
- If the top browns too fast, cover loosely with foil
- The bread is done when it is deep golden brown and sounds hollow when tapped
- Internal structure must feel firm, not soft or wet
